Selling digital products through your bio link page is an effective way to monetize your content directly. It allows creators to offer items like e-books, prints, digital resources, music and audio files, etc instantly to their audience.
With everything accessible from one link, it simplifies the buying process, increasing sales potential. Plus, there’s no need for physical inventory, making it a cost-effective way to grow your business and reach a wider audience.
Here is how to setup your digital product for sale from your link in bio page:
- Login to your Pushbio account and click on the 'link in bio page' tab on the left sidebar menu;
- Scroll to and click on the name of the page you wish to sell digital products on;
- On the next page, scroll down to 'Add Block' button and click on it;
- Click on the 'Store' tab;

- From the list of displayed blocks, click on 'Sell Your Product';
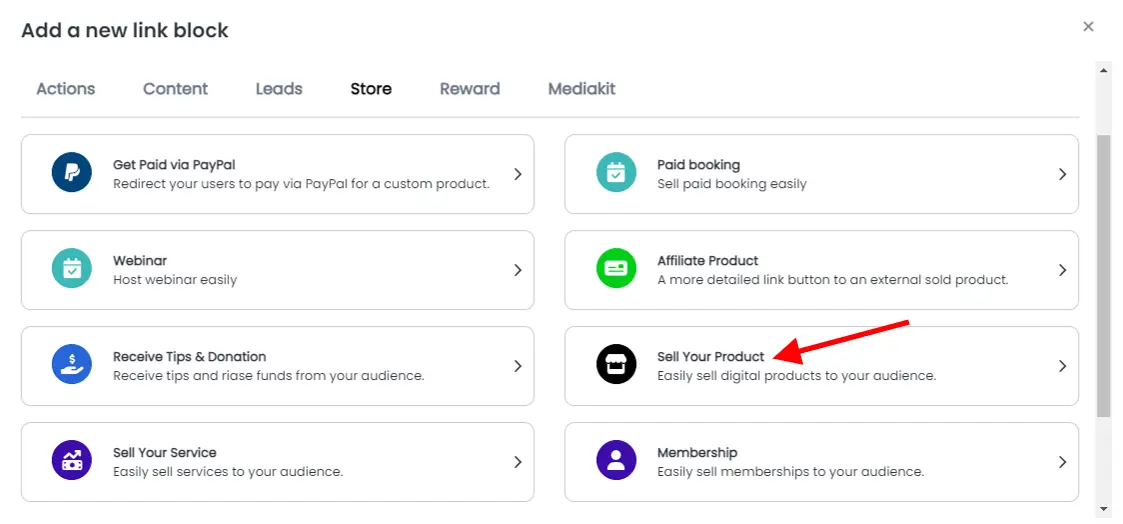
After this, you can perform the following configuration on your product block:
Product tab
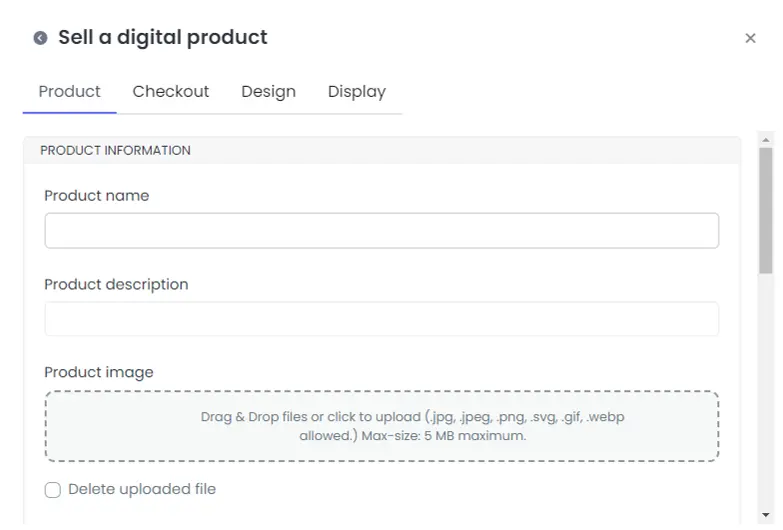
After clicking on the 'Sell Your Product' block, you will automatically land on the 'product' tab.
- On the pop up page, fill you digital product information by entering a name, product description and uploading a supported thumbnail image;
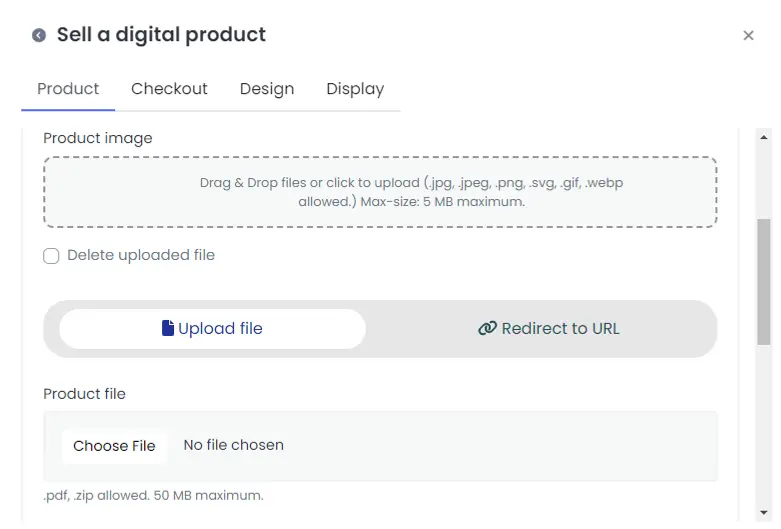
- Choose to either upload your digital product or provide a link to redirect the audience to the product page
- Next, enter a price, minimum price and currency code in the corresponding boxes provided;
- Proceed to select your preferred payment method by checking the box in fron tof your preferred choice;
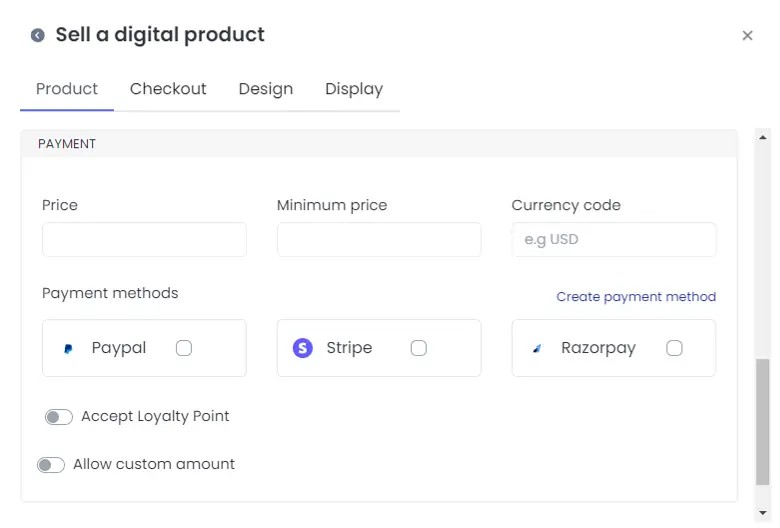
- Toggle on the 'accept loyalty point' if you want your fans to purchase product with points earned from you. (Learn how to offer loyalty point to your audience);
- Next, enter the number of points required if your turned on the 'accept loyalty point';
- You can also toggle on the 'allow custom amount' if you want your fans to decide on how much they wish to pay for your digital product;
Proceed to the next tab by clicking on the 'checkout' tab.
Checkout tab
On the 'checkout' tab, you can edit the following:
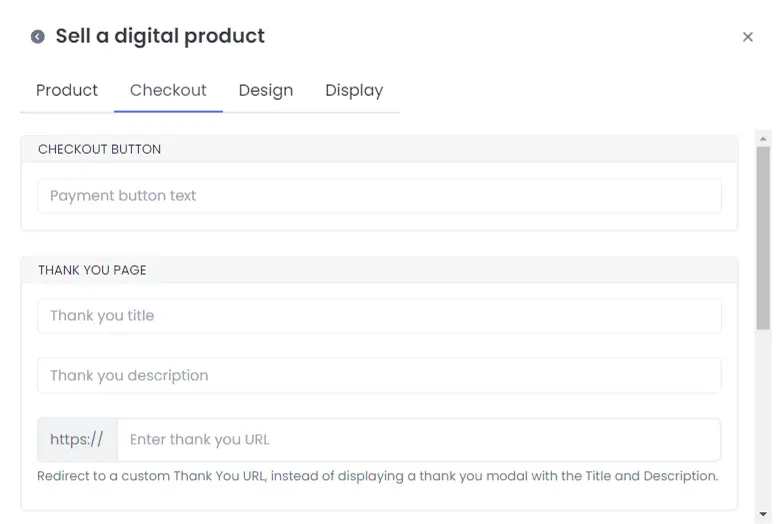
- Add a text to your checkout button in the space provided;
- Edit your thank you page by adding a title to the title space provided;
- On the 'Thank you description' space, enter a few words to appreciate the purchase;
- Alternatively, you can redirect your fans to a thank you page by adding the URL to the page into the 'thank you URL' space provided;
- If you wish to receive notification by mail, enter your email into the space labelled 'Email';
- We've also provide the 'webhook URL' option if you wish to be notified via this method instead;
Once done, click on the 'Design' tab to continue your configuration.
Design tab (Optional)
On the 'Design' tab, you can edit the following:
- Add an icon by clicking the 'Icon' button.
- Choose your preferred text and background colors.
- Adjust the 'Text Alignment' by picking left, center, justify, or right.
- Set 'Animation' and choose how many times it will run.
- Edit the border by changing its width, color, radius, and style.
- Adjust the shadow settings, including offset, blur, spread, and color.
After completing that step, select the 'Display' tab to proceed.
Display tab
In the 'display' section, you can make changes to the following settings:
- Set the dates when your digital product link should be active.
- Under 'Country,' choose the specific countries where the link will be available.
- For 'Devices,' pick the type of devices where your digital product link will function.
- Likewise, for 'Browser languages' and 'Operating Systems,' select where you want the digital product block to appear.
When you're happy with your settings, click the 'Add block' button at the bottom of the page to include the digital product block on your link in bio page.