Offering premium membership through your page is a great way to build stronger connections with your audience while creating a steady income stream. It allows you to provide exclusive content, special offers, or early access to your most loyal followers, encouraging them to support you consistently.
This setup gives your audience added value and helps you monetize your content without relying solely on one-time purchases.
Here’s how to offer premium membership on your Pushbio link in bio page:
- Log in to your Pushbio account and go to the "link in bio page" section from the left menu.
- Find and click on the page where you want to start offering premium membership.
- Scroll down, click "Add Block," then go to the "Store" tab.

- Choose the "Membership" block from the list.
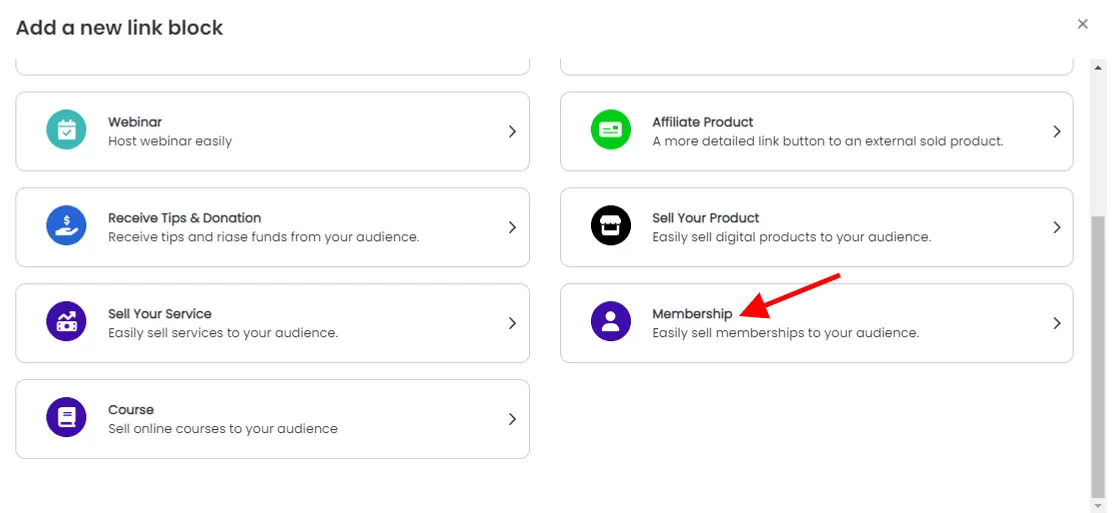
Configuring the Membership Block
Membership Tab
After selecting the "membership" block, you’ll land on the block settings page:
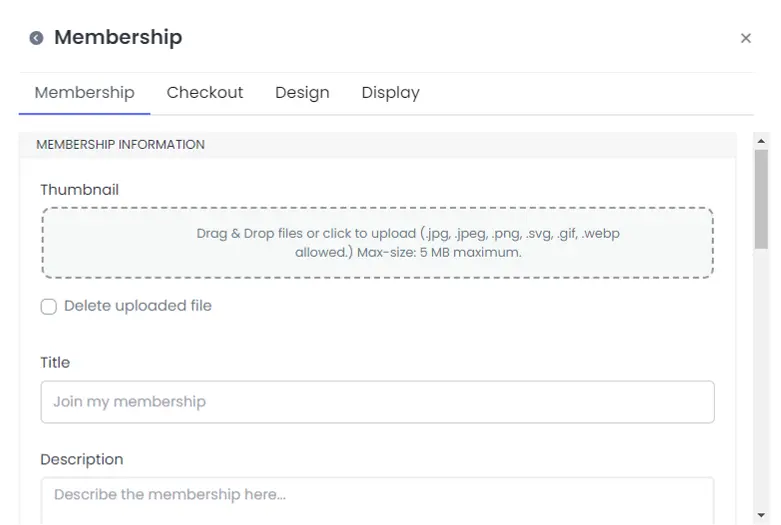
- Enter a title, description and upload a service thumbnail image for your premium membership.
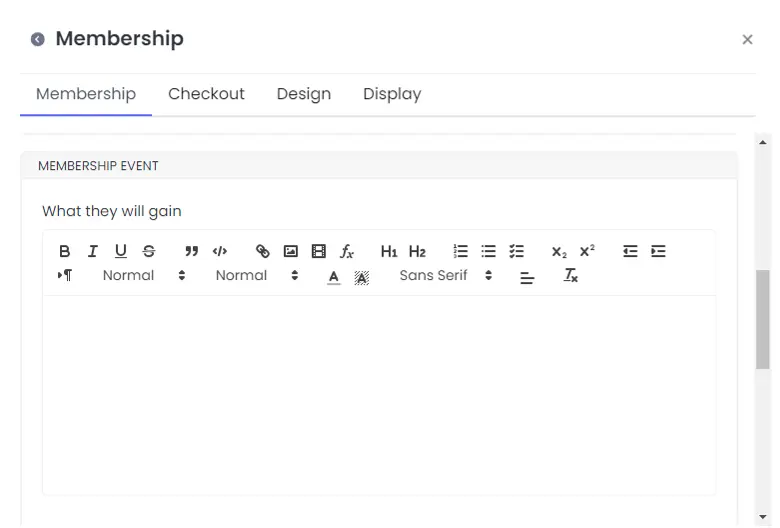
- Clearly explain what the audience stand to gain in the 'Membeship Event' space;
- Set a plan either weekly, monthly, or annually as well as its frequency.
- You can also choose to turn on the 'auto cancel subscription fee' by toggling on the switch next to it.
- Set a price, and enter your prefered currency code.
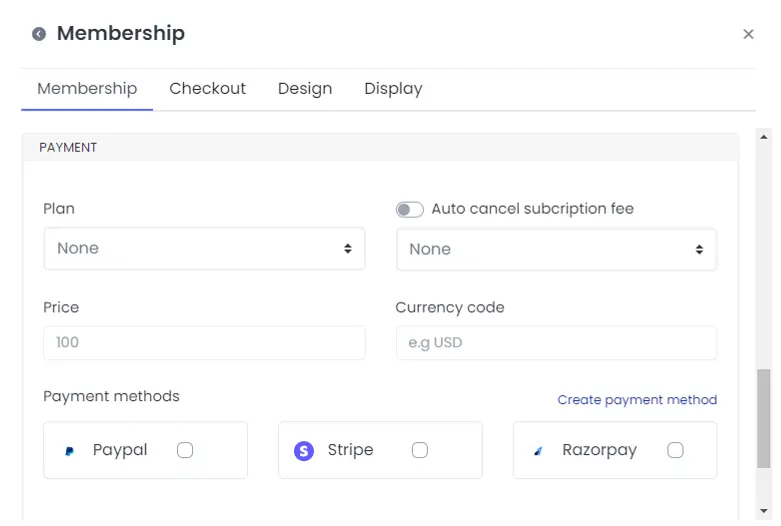
- Choose your preferred payment method by checking the box in front of your choice.
- Toggle on the 'accept loyalty point' if you want your clients to subscribe to your premium membership with points earned (Learn how to offer loyalty points to your audience).
- Next, enter the number of points required if your turned on the 'accept loyalty point'.
Move on to the next step by clicking the "Checkout" tab.
Checkout Tab
Here, you can:
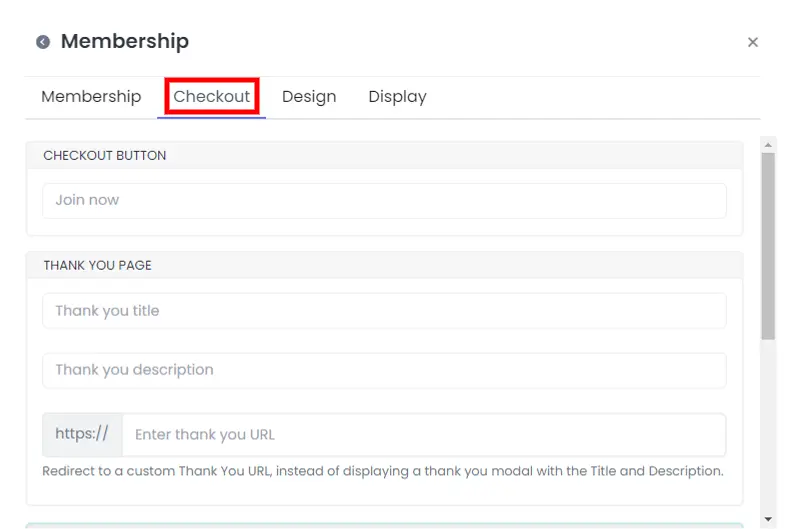
- Customize the text on your checkout button.
- Add a title and a short thank-you message on your thank-you page.
- Alternatively, you can redirect clients to an external thank-you page by adding its URL.
- Enter your email to receive notifications when someone subscribes to your membership.
- If you prefer using a webhook for notifications, provide the webhook URL.
After that, proceed to the "Design" tab.
Design Tab (optional)
Here, you can adjust the following:
- Add an icon for your service block.
- Change the text and background colors.
- Choose text alignment (left, center, right, or justify).
- Set animations, animation runs, and adjust the border's width, color, style, and shadow.
Once you're done, go to the "Display" tab.
Display Tab (optional)
On this tab, you can:
- Set the dates when the premium membership link will be active.
- Choose which countries the membership link will appear in.
- Set the device types and browser languages where the membership block will be shown.
- You can leave all fields blank for the membership block to be visible everywhere.
Once everything is set, click "Add Block" to finalize and add the premium membership feature to your page.