Selling webinars through your biolink page is a powerful way to engage your audience directly. It allows you to share valuable content, interact in real-time, and establish your expertise.
When you offer webinars, you are able to build trust, grow your following, and even monetize through ticket sales or paid access, all from a single link. It’s a simple, effective way to connect with your community and expand your reach.
To host webinars on your biolink page, follow these steps:
- Login to your Pushbio account and click on the 'link in bio page' tab on the left sidebar menu;
- Scroll to and click on the name of the page you wish to host webinars on;
- On the next page, scroll down to 'Add Block' button and click on it;
- Click on the 'Store' tab;

- From the list of displayed blocks, click on 'Webinar';
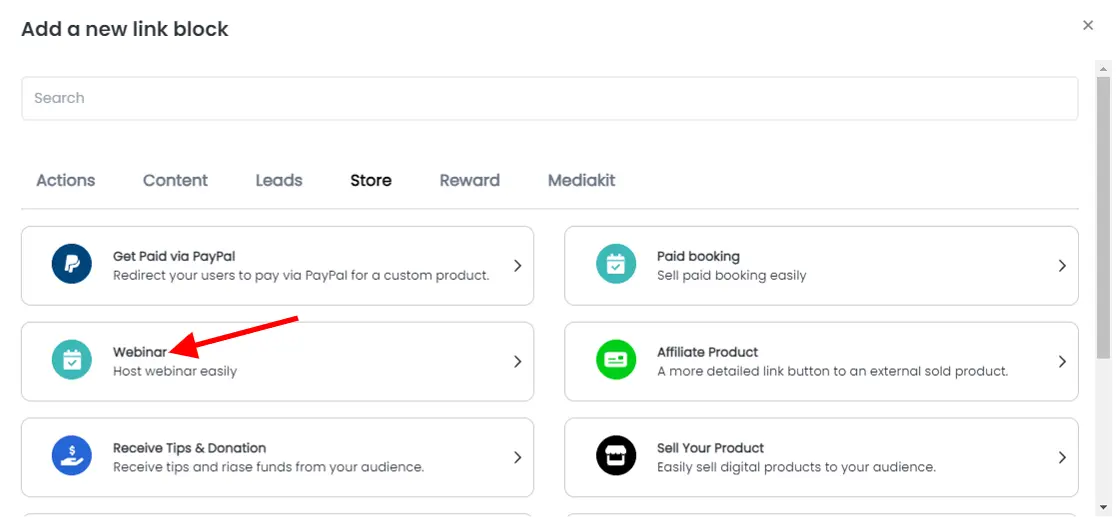
After this, you can perform the following configuration on your webinar block:
Webinar tab
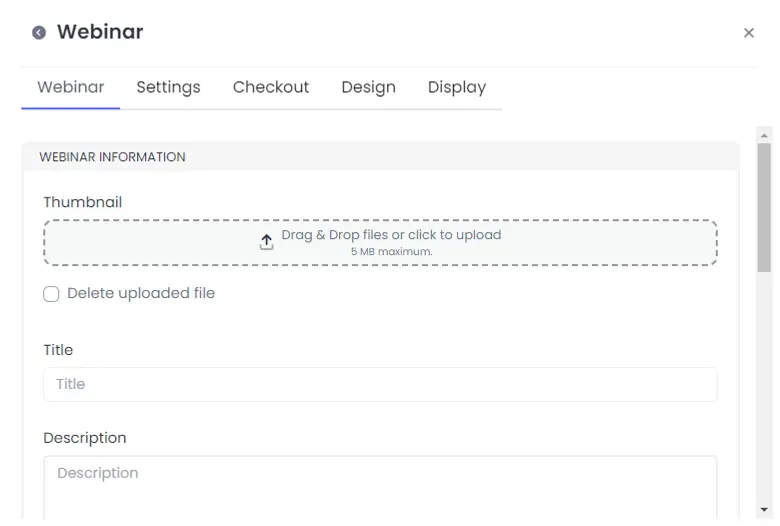
After clicking on the 'Webinar' block, you will automatically land on the 'webinar' tab.
- On the pop up page, fill your webinar information by entering a title, description and uploading a supported thumbnail image;
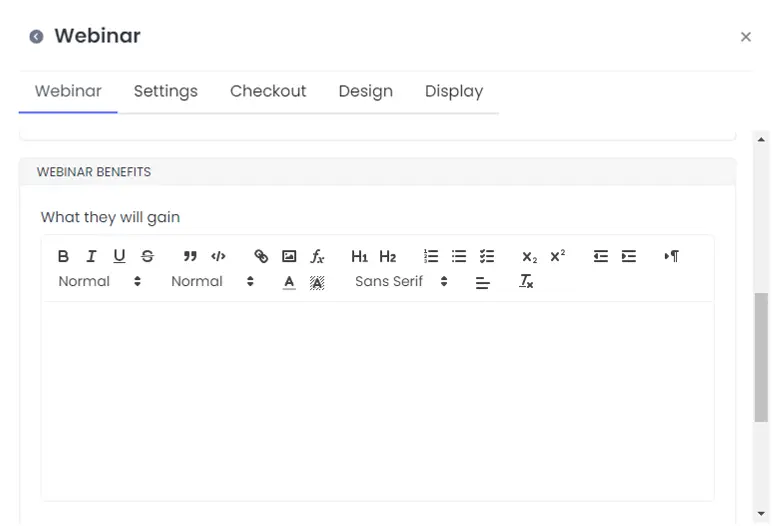
- Explain the benefits your audience stand to gain for attending your webinar;
- If you wish to monetize your webinar, toggle on the 'charge for webinar' switch;
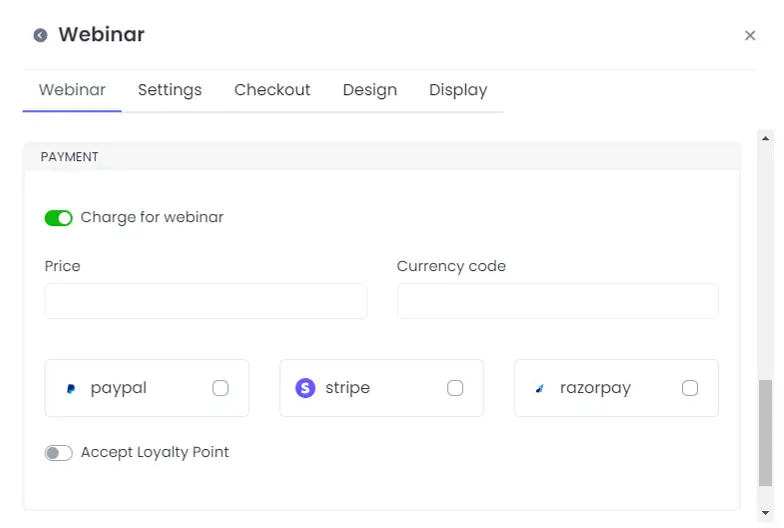
- Next, enter a price and currency code in the corresponding boxes provided;
- Proceed to select your preferred payment method by checking the box in front of your preferred choice;
- Toggle on the 'accept loyalty point' if you want your fans to pay for webinar with points earned through your mission task. (You can read more about mission here)
- Next, enter the number of points required if your turned on the 'accept loyalty point' (Learn how to offer loyalty points to your audience);
Once done, move to the next tab by tapping on the 'settings' tab
Settings tab
On the 'settings' tab, you can perform the following:
- Pick a location for your webinar either online, offline or a custom venue;
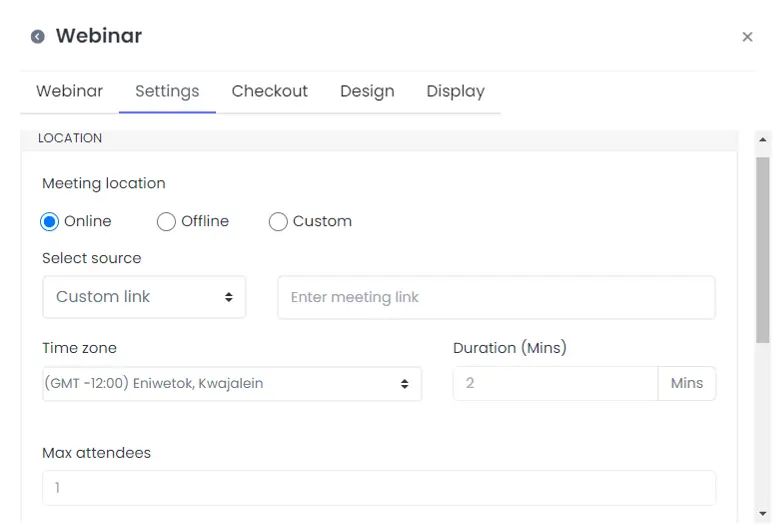
- Next, select source link and input your URL into the box provided;
- Set a timezone for you webinar and enter the duration for the webinar in minutes;
- Set the number of attendees you want present;
- Add spot by entering a valid date and time in their respective boxes before clicking on the 'Add Spot' button;
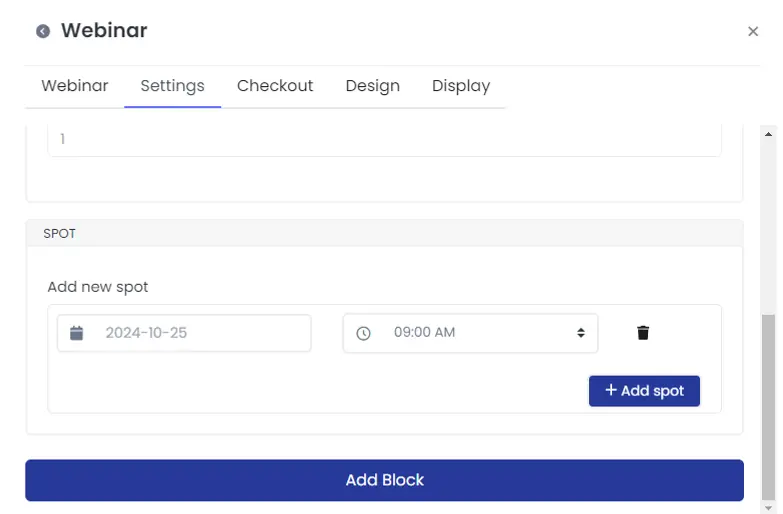
Proceed to the next tab by clicking on the 'checkout' tab.
Checkout tab
On the 'checkout' tab, you can edit the following:
- Add a text to your checkout button in the space provided;
- Edit your thank you page by adding a title to the title space provided;
- On the 'Thank you description' space, enter a few words to appreciate the audience for signing up for your webinar;
- Alternatively, you can redirect your fans to a thank you page by adding the URL to the page into the 'thank you URL' space provided;
- If you wish to receive notification by mail, enter your email into the space labelled 'Email';
- We've also provide the 'webhook URL' option if you wish to be notified via this method instead;
Once done, click on the 'Design' tab to continue your configuration.
Design tab (optional)
On the 'Design' tab, you can edit the following:
- Add an icon by clicking the 'Icon' button.
- Choose your preferred text and background colors.
- Adjust the 'Text Alignment' by picking left, center, justify, or right.
- Set 'Animation' and choose how many times it will run.
- Edit the border by changing its width, color, radius, and style.
- Adjust the shadow settings, including offset, blur, spread, and color.
After completing that step, select the 'Display' tab to proceed.
Display tab (optional)
In the 'display' section, you can make changes to the following settings:
- Set the dates when your webinar link should be active.
- Under 'Country,' choose the specific countries where the webinar link will be available.
- For 'Devices,' pick the type of devices where your webinar link will function.
- Likewise, for 'Browser languages' and 'Operating Systems,' select where you want the webinar block to appear.
When you're done with your settings, click the 'Add block' button at the bottom of the page to include the webinar block to your link in bio page.