Setting up paid bookings on your page allows you to offer services directly to your audience and earn income. It makes it easy for clients to schedule appointments, consultations, or events, while handling payments seamlessly.
This simplifies the process of managing bookings and ensures that your business or personal services are available anytime, giving you more control over your schedule and revenue.
To set up paid bookings on your link in bio page using Pushbio, follow these steps:
- Log into your Pushbio account and click on the 'Link in Bio Page' tab in the sidebar;
- Choose the page where you want to set up paid booking;
- Scroll down and click the 'Add Block' button, then select the 'Store' tab;

- From the available blocks, click on 'Paid booking.'
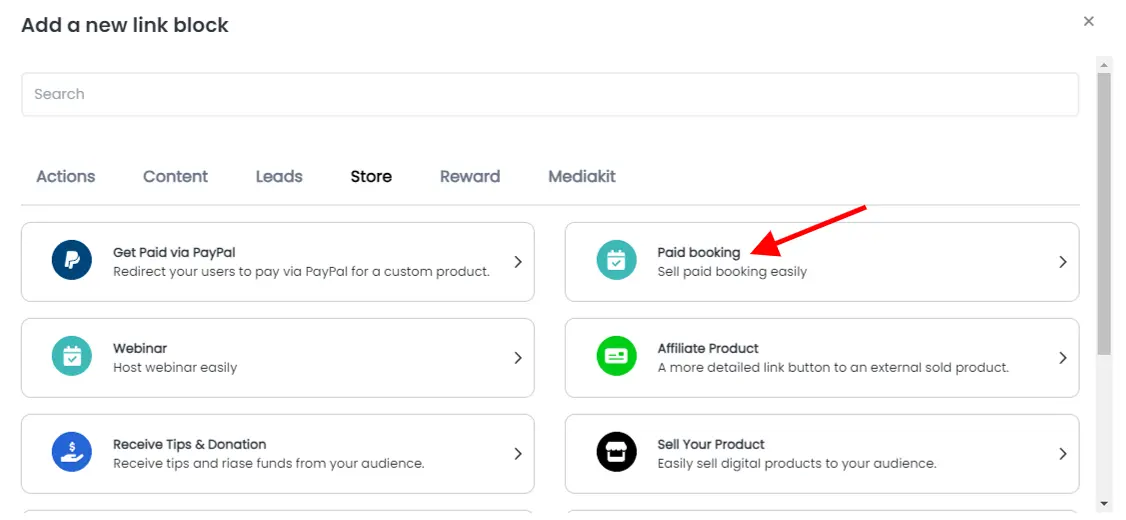
Booking Tab
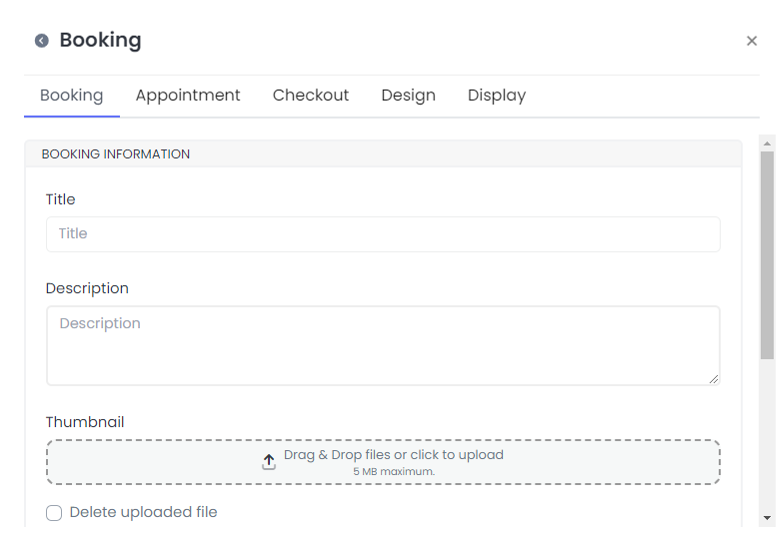
After selecting 'Paid booking,' you’ll land on the configuration page.
- Enter a title for your paid booking, give detailed description, and upload a thumbnail;
- If you choose to charge for the paid booking, toggle on the 'charge for booking' option;
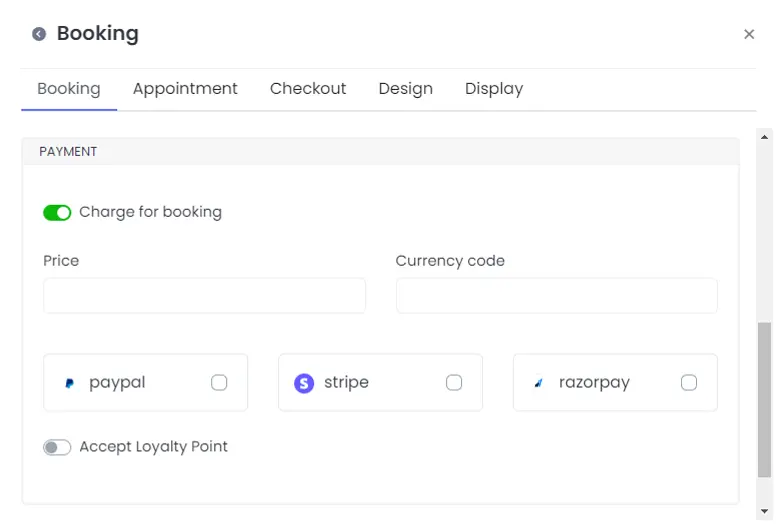
- Set the price and currency for the booking;
- Choose your preferred payment method and toggle the 'Accept Loyalty Points' option if applicable; (Learn how to reward your audience with lotalty points)
- Enter the required points for payment if loyalty points are allowed.
Appointment Tab
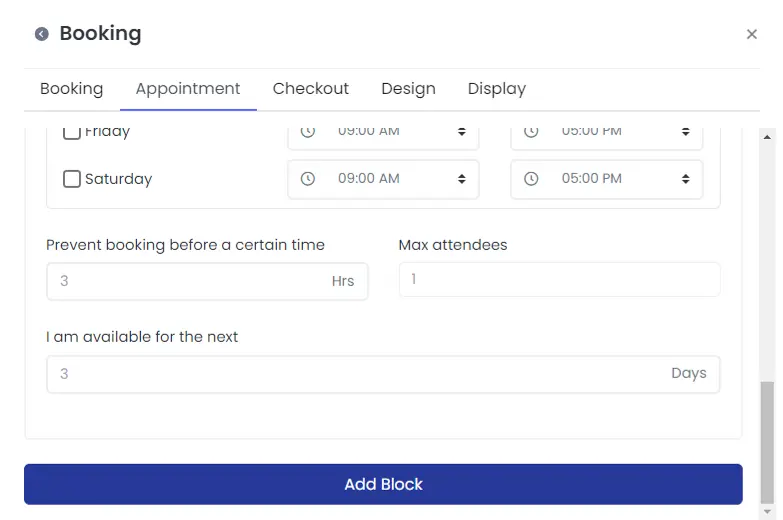
In the 'Appointment' tab:
- Set your booking location (online, offline, or in person);
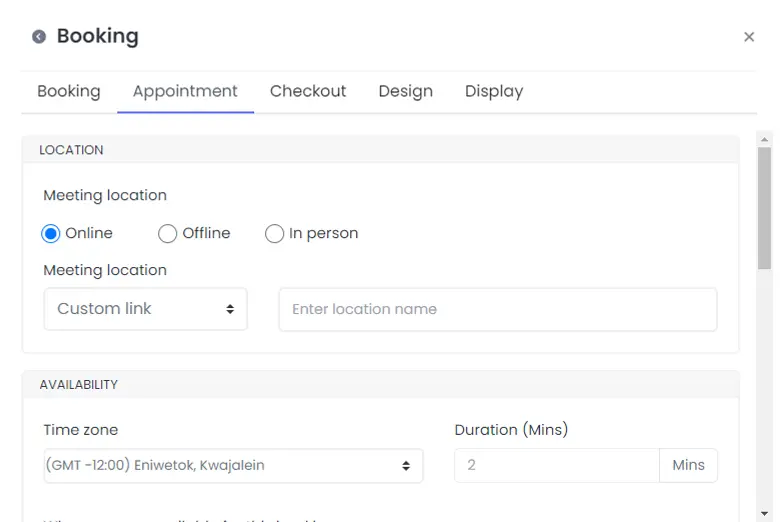
- Add a link for online paid booking;
- Set the timezone and duration of the booking;
- Determine when you will be available for the booking session and define the dates you will be available;
- Specify the number of attendees;
- Set a time for bookings to stop before your booking session.
Checkout Tab
In the 'Checkout' tab:
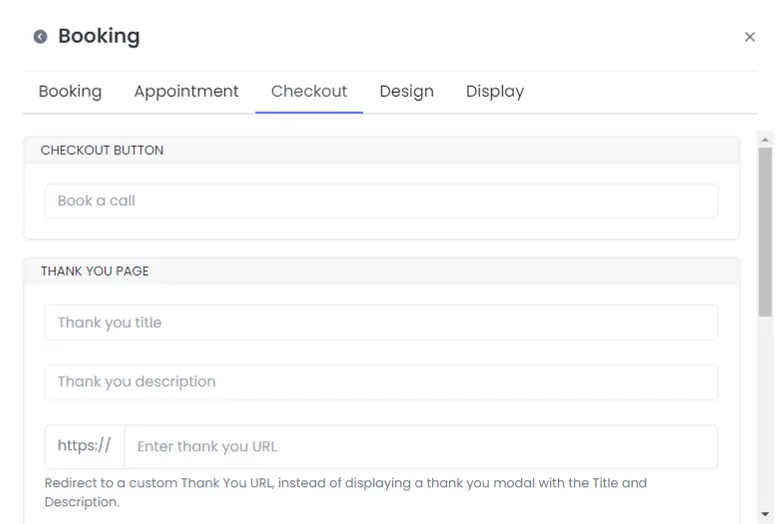
- Customize the checkout button text.
- Add a thank you title and message for attendees.
- Optionally, redirect audience to a specific URL containing your appreciation message;
- Enter an email address for notifications or use a webhook for updates.
Design Tab (optional)
In the 'Design' tab:
- Add an icon, adjust text and background colors.
- Set text alignment and customize animation options.
- Adjust border and shadow settings for a polished look.
Display Tab (optional)
In the 'Display' tab:
- Schedule when the booking link will be active;
- Select the countries, devices, browser languages, and operating systems for your booking block;
When all configurations are complete, click 'Add Block' to finalize and add the paid booking block to your bio link page.