Receiving tips and donations through your page is essential for creators, as it provides a simple way to earn money directly from your audience. It allows supporters to contribute easily, which helps creators sustain their work, grow their platform, and continue producing valuable content.
This feature also enhances audience engagement by making it easy for followers to show their appreciation. Here is how to use it:
- Login to your Pushbio account and click on the 'link in bio page' tab on the left sidebar menu;
- Scroll to and click on the name of the page you wish to receive donations on;
- On the next page, scroll down to 'Add Block' button and click on it;
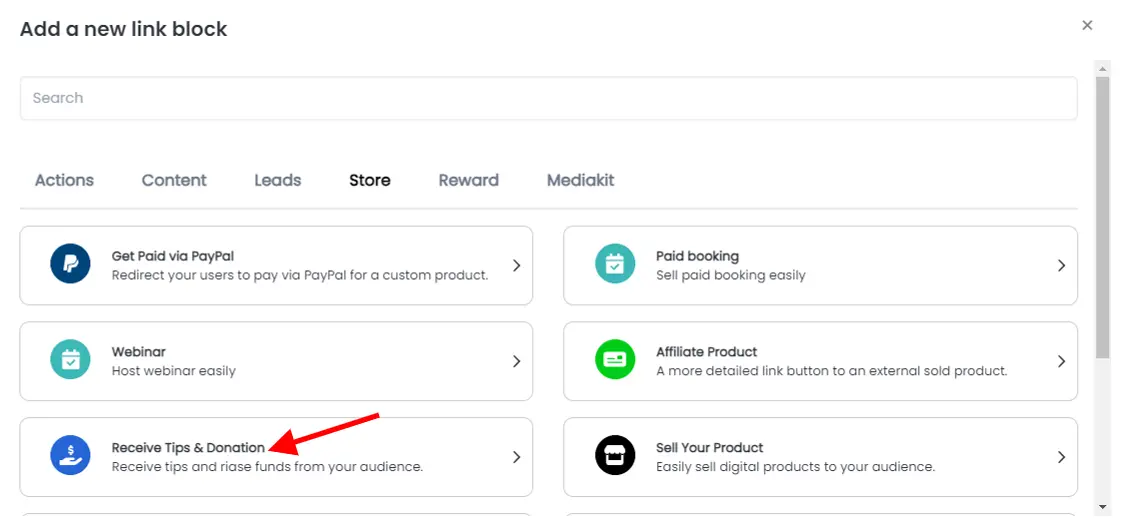
- Click on the 'Store' tab;

- From the list of displayed blocks, click on 'Receive Tips and Donations';

After this, you can perform the following configuration on your donation block:
Receive donation tab
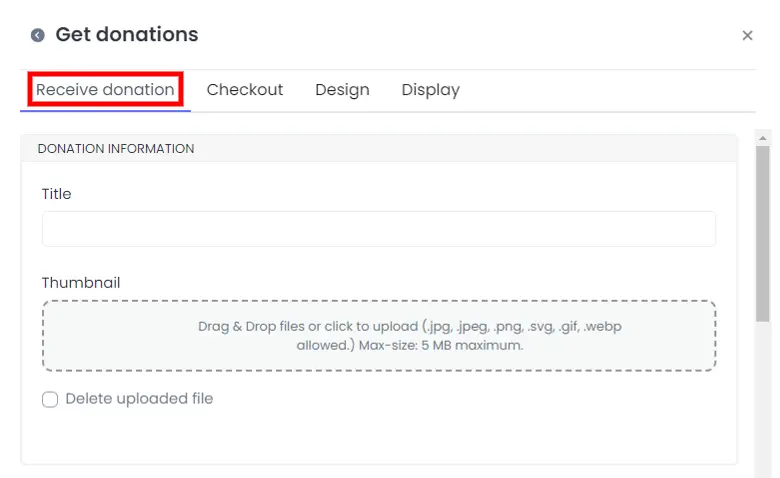
Once you click on the 'Recieve Tips and Donations; block, you will automatically land on the 'receive donation' tab.
- On the pop up page, fill you donation information by entering a title and uploading a supported thumbnail image;

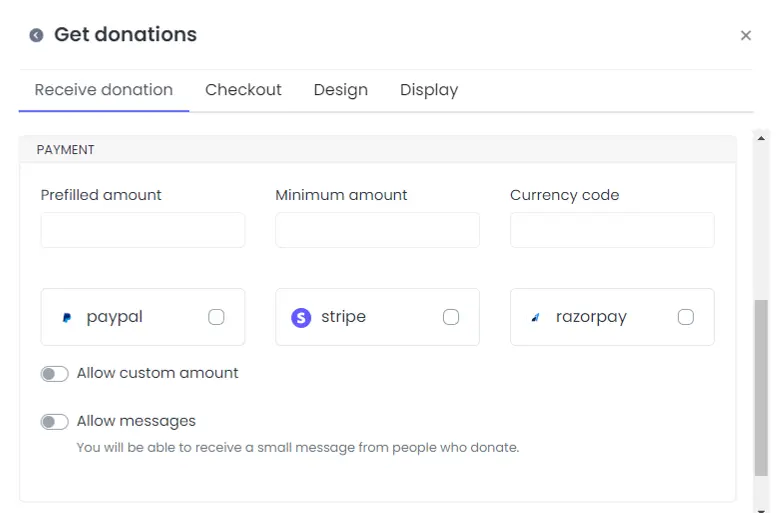
- Next, enter a prefilled amount, minimum amount and currency code in the corresponding boxes provided;
- Proceed to select your preferred payment method;
- Toggle on the 'allow custom amount' if you want your fans to decide on how much they wish to donate or tip you;

- You can also toggle on the 'allow messages' feature to get messages from fans who donated.
Proceed to the next tab by scrolling up and clicking on the 'checkout' tab.
Checkout tab
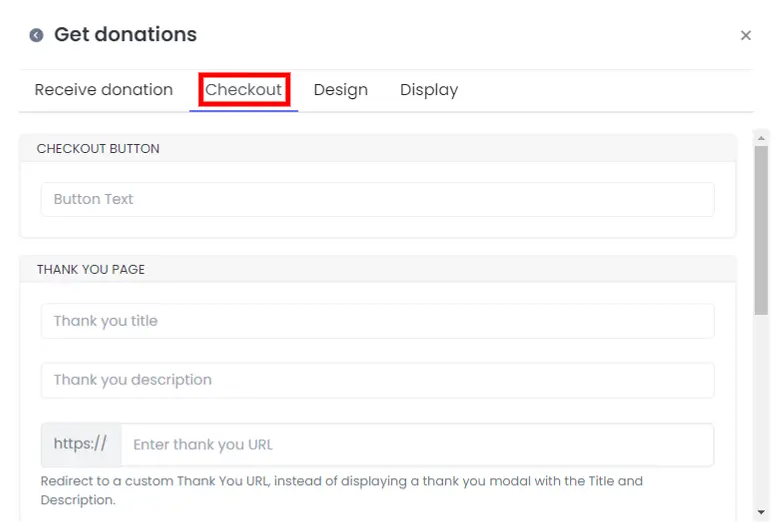
On the 'checkout' tab, you can edit the following:

- Add a text to your checkout button in the space provided;
- Edit your thank you page by adding a title to the title space provided;
- On the 'Thank you description' space, enter a few words to shoe appreciation to your fans;
- Alternatively, you can redirect your fans to a thank you page by adding the URL to the page into the 'thank you URL' space provided;
- If you wish to receive notification by mail, enter your email into the space labelled 'Email';
- We've also provide the 'webhook URL' option if you wish to be notified b=via this method instead;
Once done, click on the 'Design' tab to continue your configuration.
Design tab (optional)
On the 'Design' tab, you can edit the following:
- Add icon under the 'Icon' button;
- Change text and background color;
- Determine 'Text Alignment' by selecting from the options available (left, center, justify or right);
- Set 'Animation' and the number of 'Animation runs';
- Edit border width, color, radius, and style;
- Set border shadow offset, blur, spread and color;
Once done, click on the 'Display' tab to continue.
Display tab (optional)
On the 'displa' tab, you can edit the following:
- Schedule the dates you want your donation link to work;
- Under 'Country' select the contries where you want your donation link to work;
- On 'Devices' set the device type you want your donation libk to work on;
- Similarly, on 'Browser languages' and 'Operating Systems' select respectively where you want to show your donation block to.
Once you are satiesfied with all your configuration, click on the 'Add block' button at the bottom of the page to add the donation block to your link in bio page.