Building and selling online courses through your biolink page allows you to monetize your expertise directly. With just one click, followers can access educational content, making it easier to generate income while sharing valuable knowledge.
This is a convenient way to offer learning experiences and build a deeper connection with followers while earning revenue.
Here’s how you can build and sell online courses with your Pushbio landing page:
- Log in to your Pushbio account and go to the "link in bio page" section from the left menu;
- Find and click on the page where you want to start selling online courses;
- Scroll down, click "Add Block," then go to the "Store" tab;

- Choose the "Courses" block from the list;
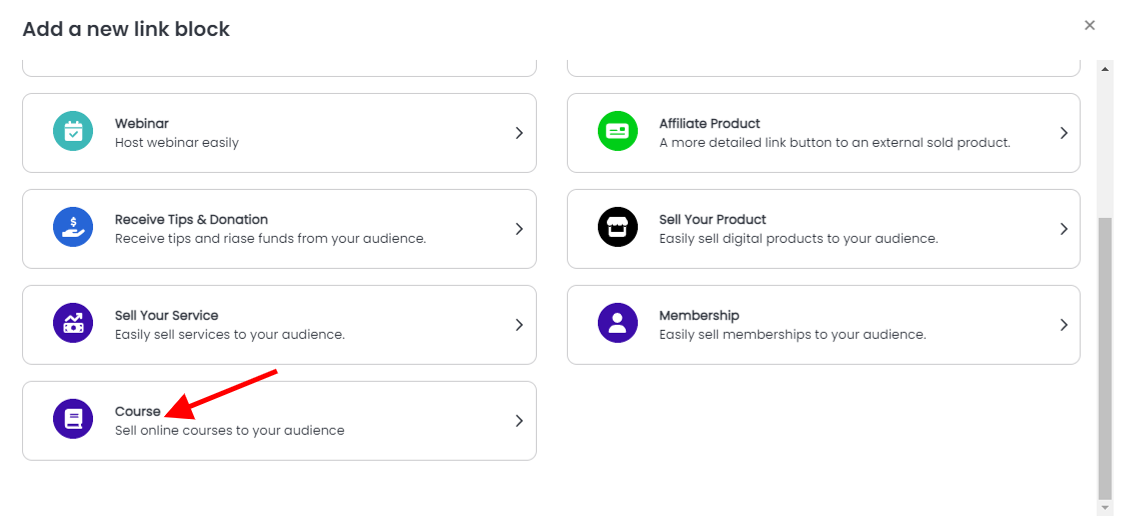
Configuring the Online Course Block
Course Tab
After selecting the "Course" block, you’ll land on the block settings page.
- Enter a course name, description and upload a course thumbnail image;
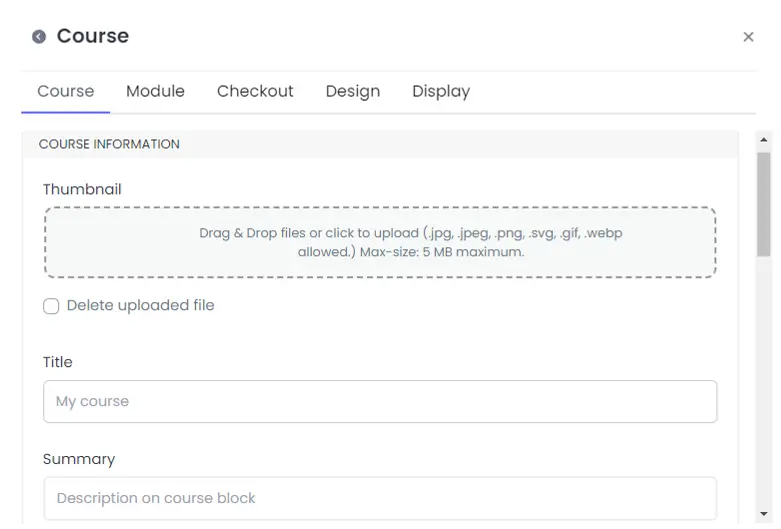
- Give a detailed outline of the course event to give the audience an hint of what to expect;
- Determine the frequency of payment either one-time or recurring;
- Set a price, and currency code;
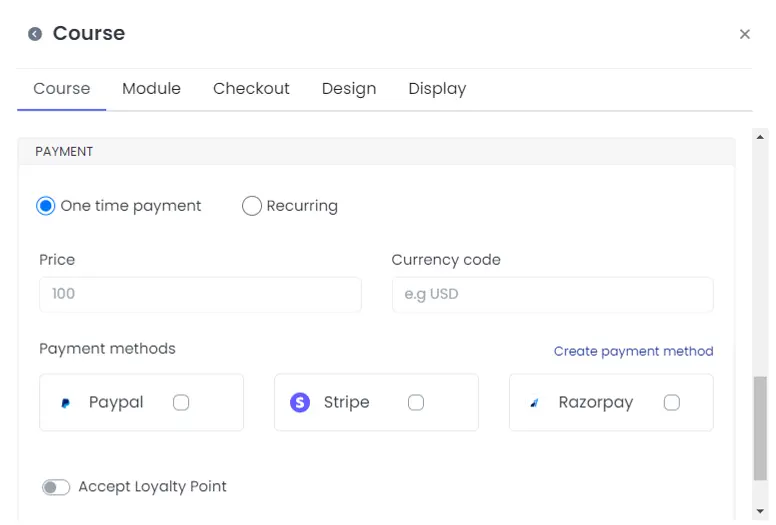
- Choose your preferred payment method by checking the box in front of your choice.
- Toggle on the 'accept loyalty point' if you want your audience to purchase your course with points earned. (Learn how to set mission for your audience in exchange for loyalty points).
- Next, enter the number of points required if your turned on the 'accept loyalty point'.
Module Tab
On the 'module' page, you can create and edit your online course:
- Click on the 'Add Module' button;
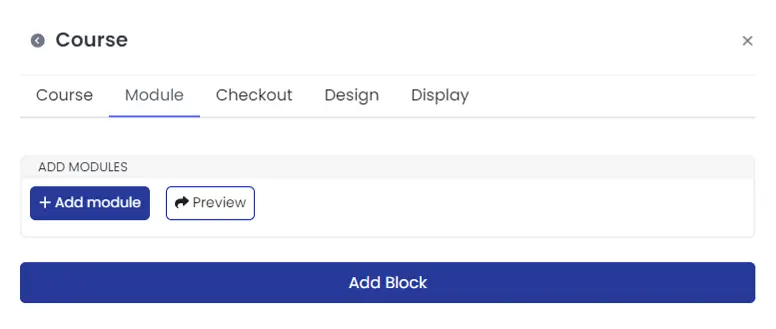
- Add module title to the box provided;
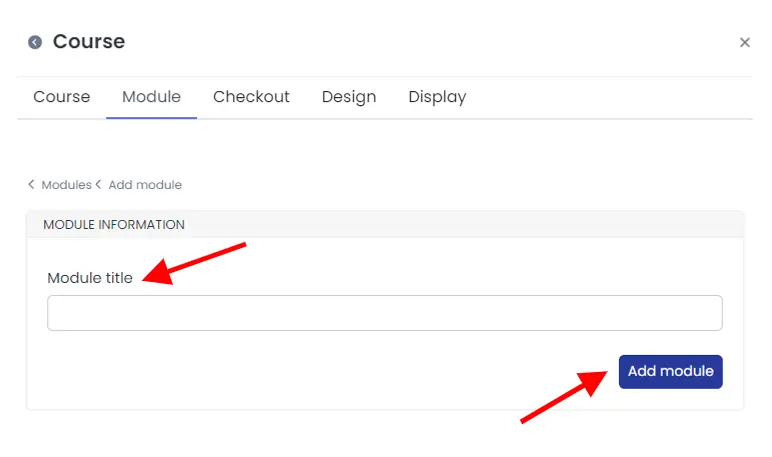
- After entering the title, click on the 'Add module' button;
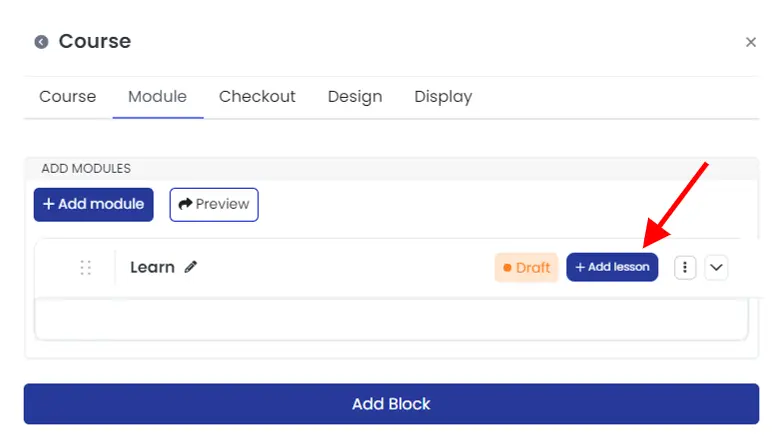
- Edit your module by clicking on the 'Add lesson' button in front of the module name;
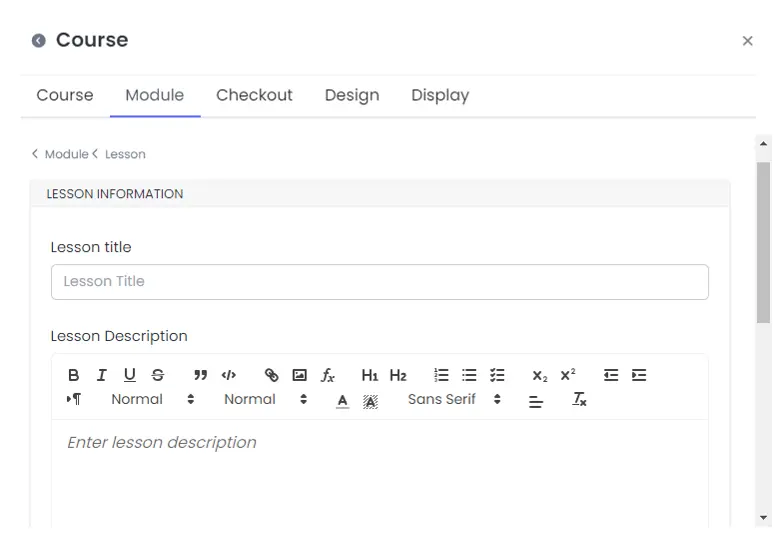
- Enter lesson title and give a detailed description of the lesson in their respective boxes;
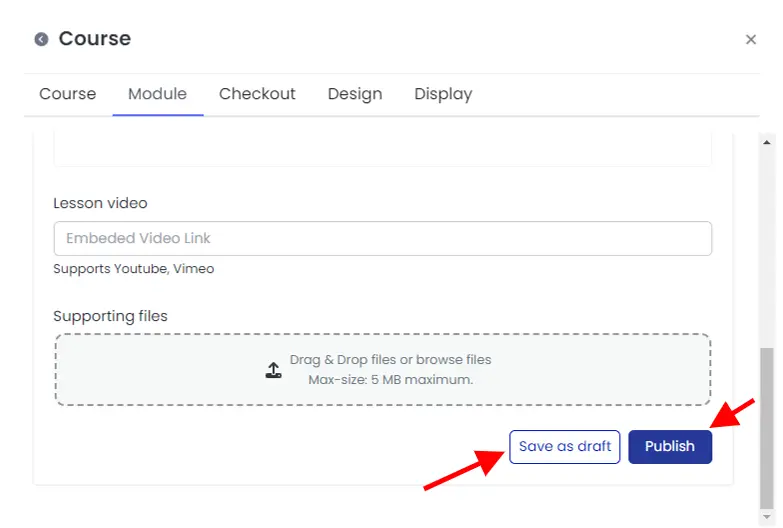
- If your lesson has a video online, you can embed the link in the 'lesson video' tab. We support videos from YouTube and Vimeo;
- Once set, you can either save the lesson as 'Draft' or 'Publish'
- Repeat the process to add all the lessons of your course;
- After adding all your lessons, click on the 'Preview' button to see how your online course looks like.
Move on to the next step by clicking the "Checkout" tab.
Checkout Tab
Here, you can:
- Customize the text on your checkout button.
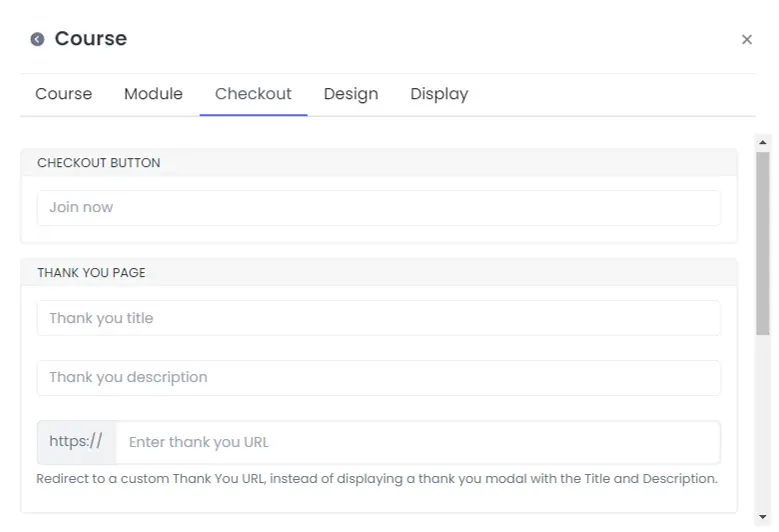
- Add a title and a short thank-you message on your thank-you page.
- Alternatively, you can redirect clients to an external thank-you page by adding its URL.
- Enter your email to receive notifications when someone purchases your course.
- If you prefer using a webhook for notifications, provide the webhook URL.
After that, proceed to the "Design" tab.
Design Tab (optional)
Here, you can adjust the following:
- Add an icon for your service block.
- Change the text and background colors.
- Choose text alignment (left, center, right, or justify).
- Set animations, animation runs, and adjust the border's width, color, style, and shadow.
Once you're done, go to the "Display" tab.
Display Tab (Optional)
On this tab, you can:
- Set the dates when the course link will be active.
- Choose which countries the course link will appear in.
- Set the device types and browser languages where the course block will be shown.
- You can leave all fields blank for the course block to be visible everywhere.
Once everything is set, click "Add Block" to finalize and add the 'course' feature to your page.