Setting up a client portal on your Pushbio page is essential for whitelabelling, assigning of workspace and delegating specifi tasks. It provides a professional space for clients to function.
Before you can use the client portal feature, you need to set up your custom domain name first.
How to Set up Portal Domain
- Login to your Pushbio account;
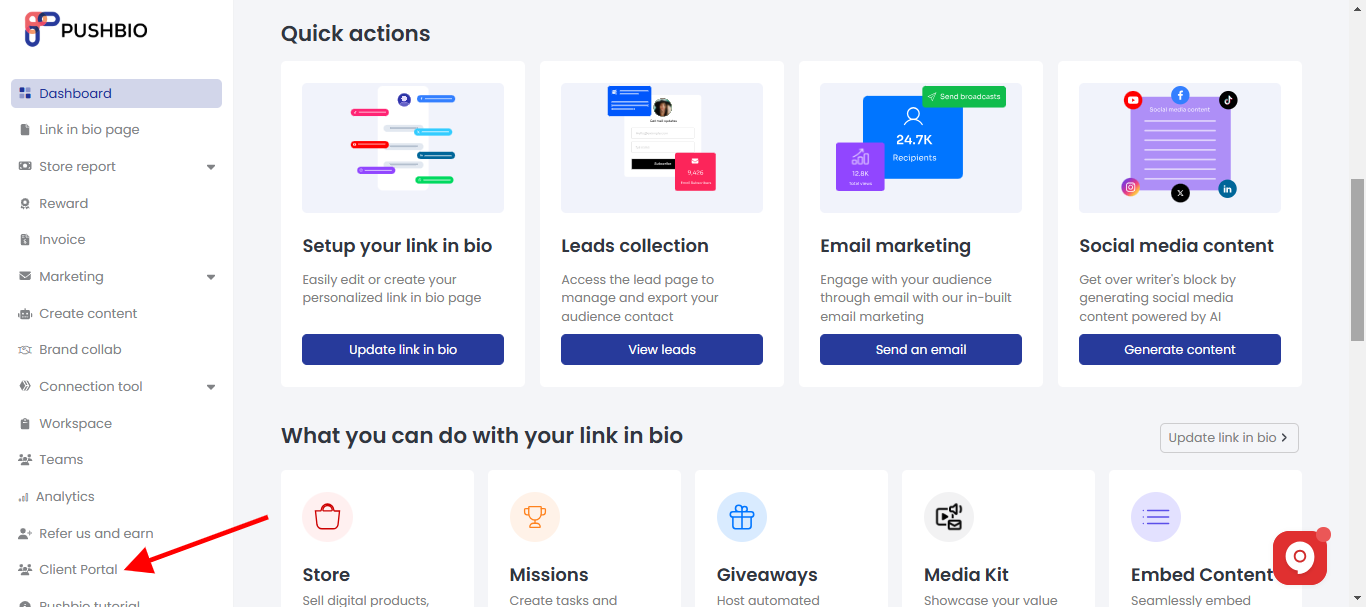
- On the user dashboard area, click on the 'Client portal' option on the left sidebar menu;

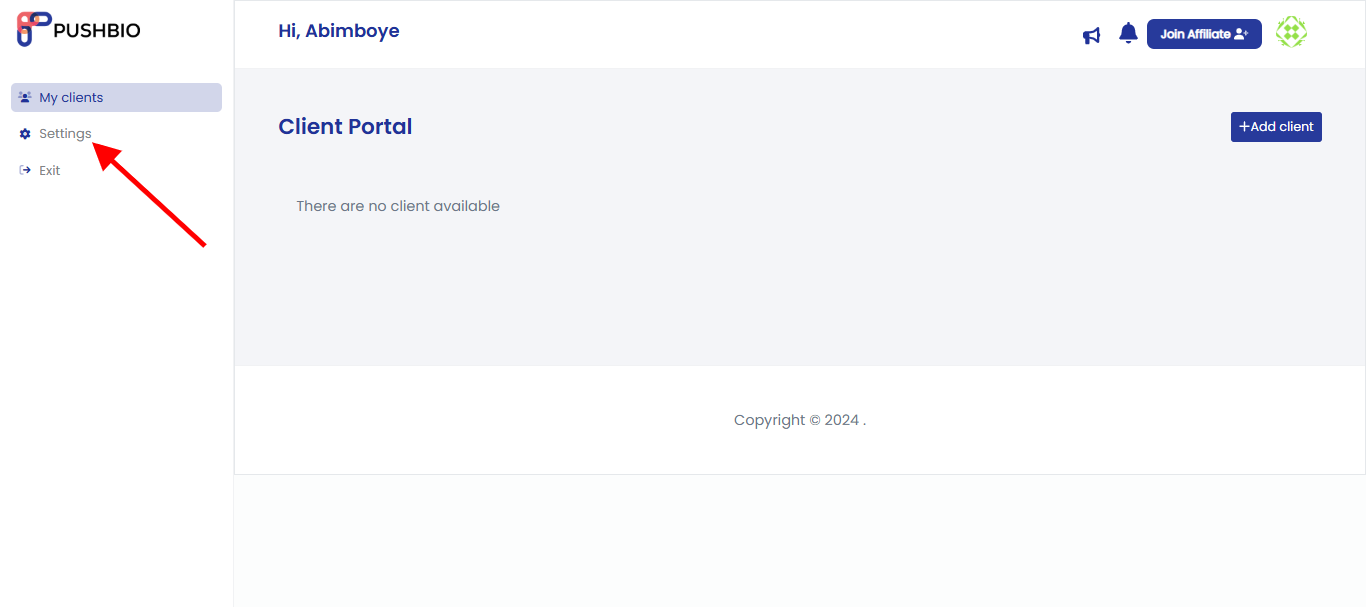
- On the next page, click on the 'Settings' tab located on the left side menu;

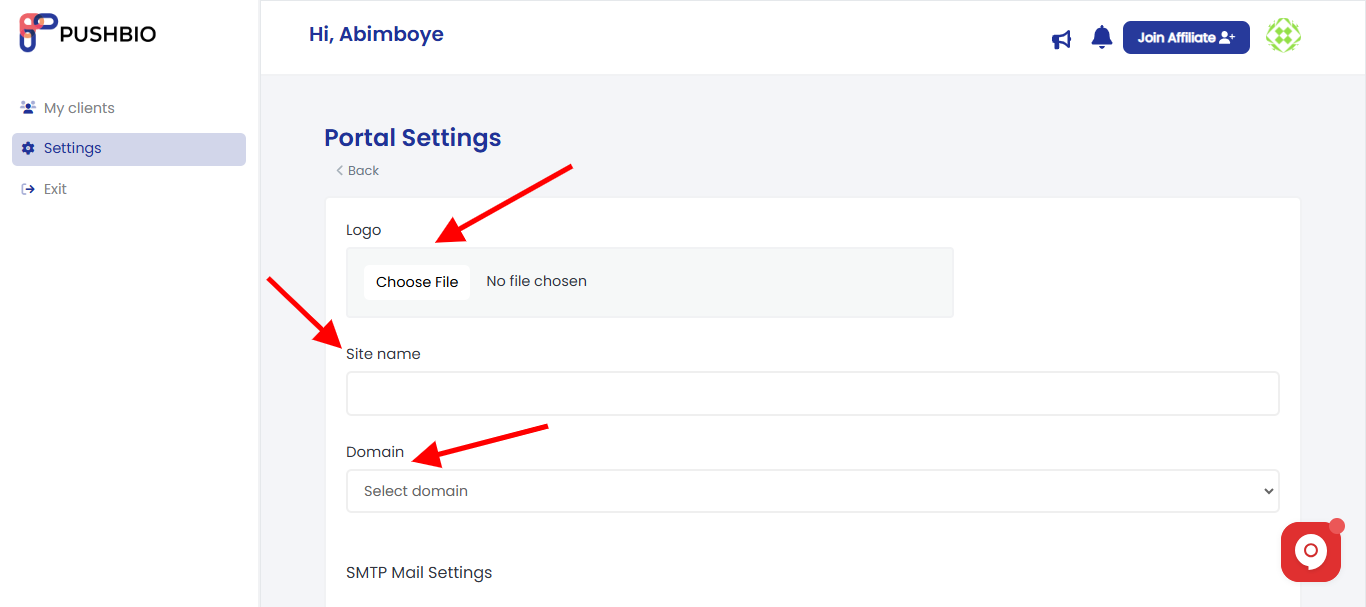
- You can choose to upload a logo by clicking on the "Choose file' button;
- Enter your site name in the space provided;

- Next, set your domain by picking from the available ones;
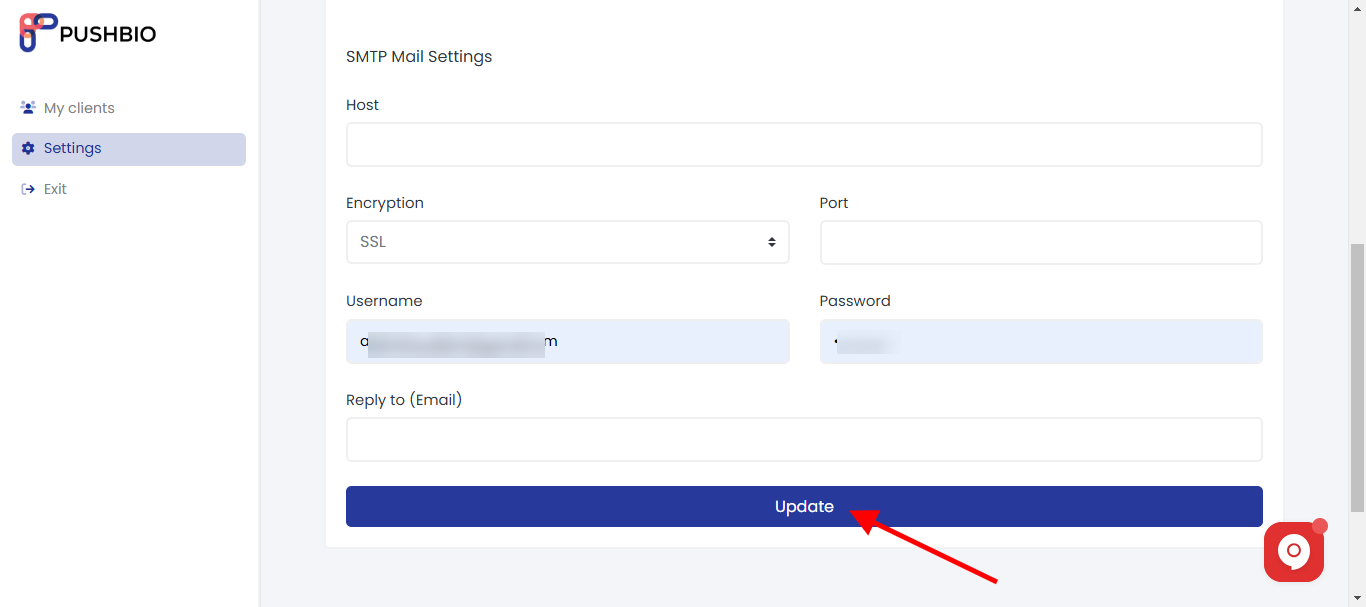
- You can also set up your SMTP mail settings by filling the host, port, SSL, username and password fields;
validate smtp using smtp gmass.co
buy or get smtp details from host

- In the 'Reply to' box, enter an email address you wish to use to respond via mail.
- When you are done, click on the 'update' button to save your portal settings.