Managing clients from your Pushbio account is essential for keeping your workflow organized and professional. It allows you to manage their projects.
Follow these steps to help you manage your clients from your client portal;
- Login to your Pushbio account;
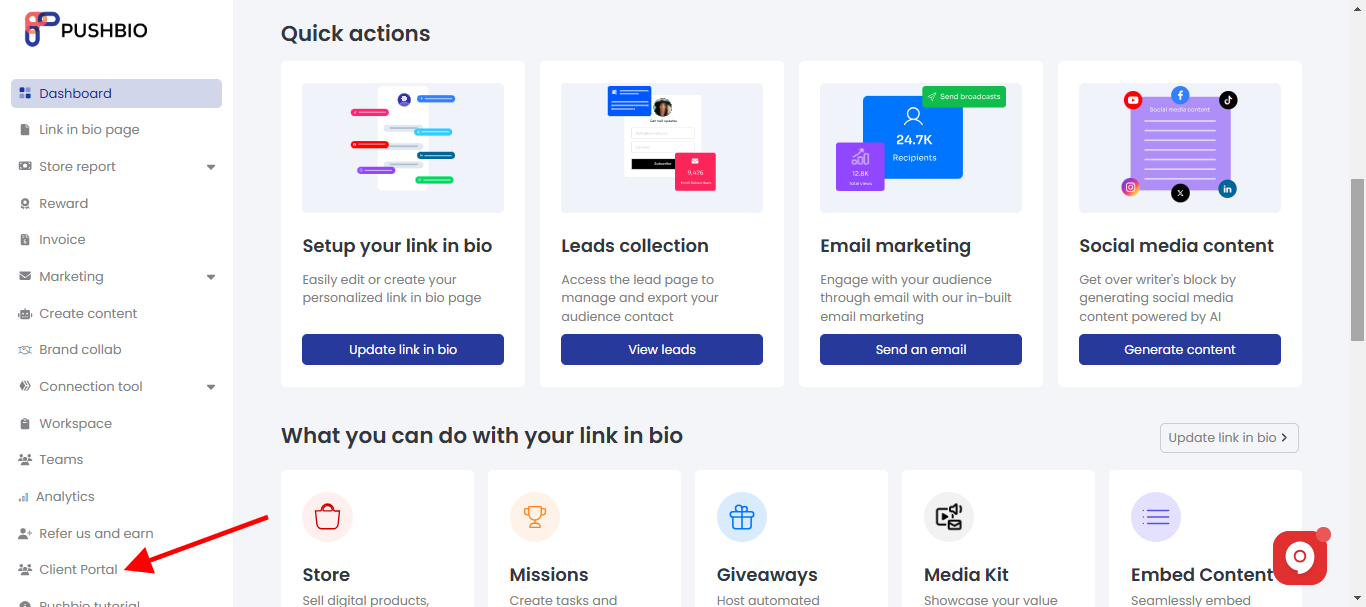
- On the user dashboard area, click on the 'Client portal' option on the left sidebar menu;

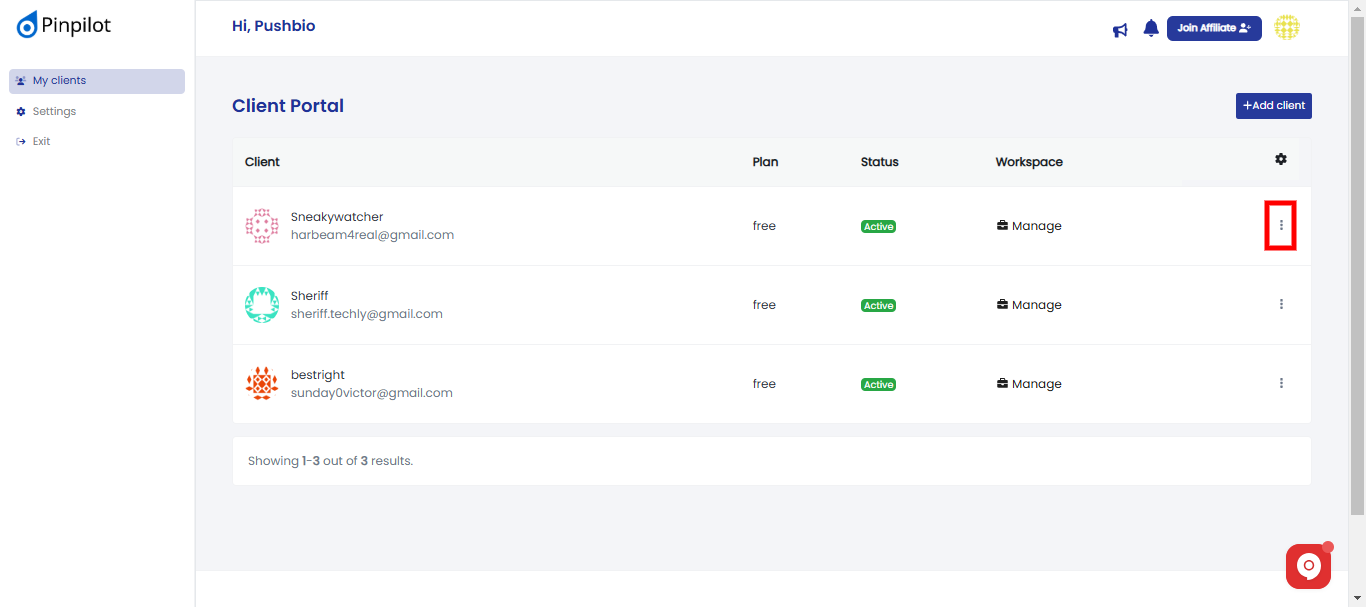
- On the next page, a list of your clients are displayed. Scroll to the name of the client you wish to manage and click on the more icon represented by three vertical dots;

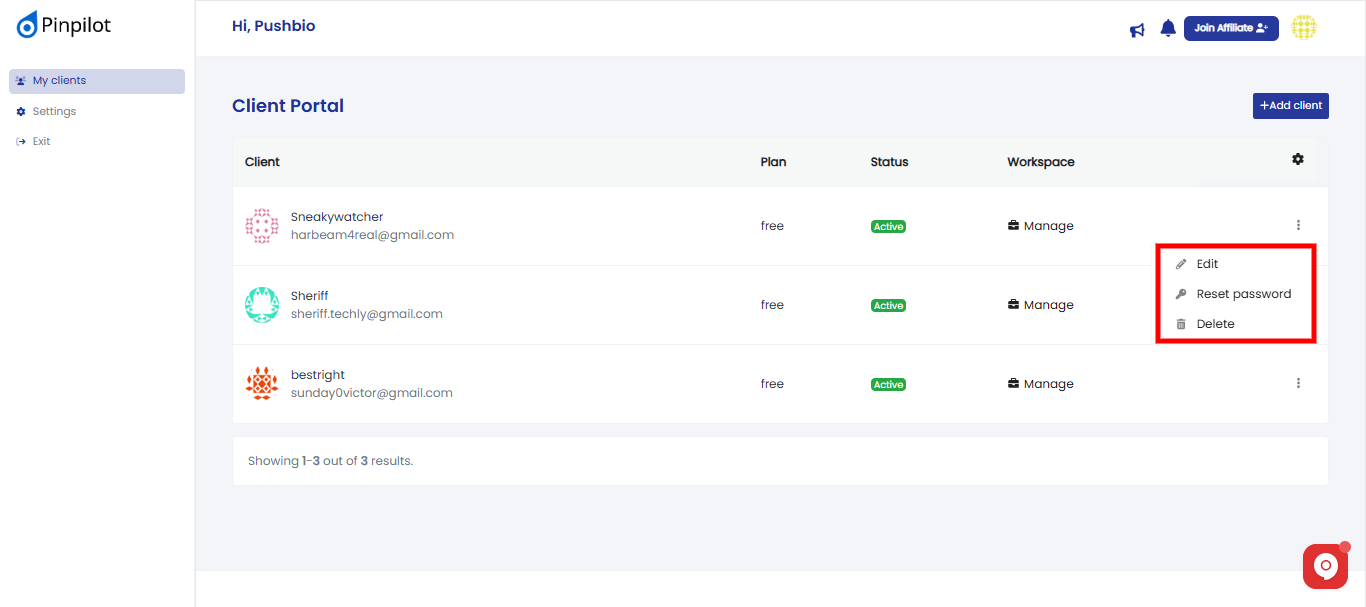
- A pop-up box appears with some options;

- From the pop-up list, you can edit, reset password for a client or choose to delete the client;
- Scroll to the client you wish to manage to and click on the 'manage' button in front of it;

- From here, you can change the client name and client role or title;
- You can also edit the status of a client from 'Active' to 'Inactive' and vise versa;

- Additionally, you can assign workspace as well as set client access type;
- Once you are done, click on the 'Update' button to save your changes.
Read More: