Adding new clients to your client portal helps you stay organized and build stronger relationships. It provides a dedicated space to manage client information, and assign workspace. This feature ensures efficient collaboration leading to better satisfaction and long-term partnerships.
To add a new client to your portal, you must first setup your portal domain.
Here is how to add clients to your portal:
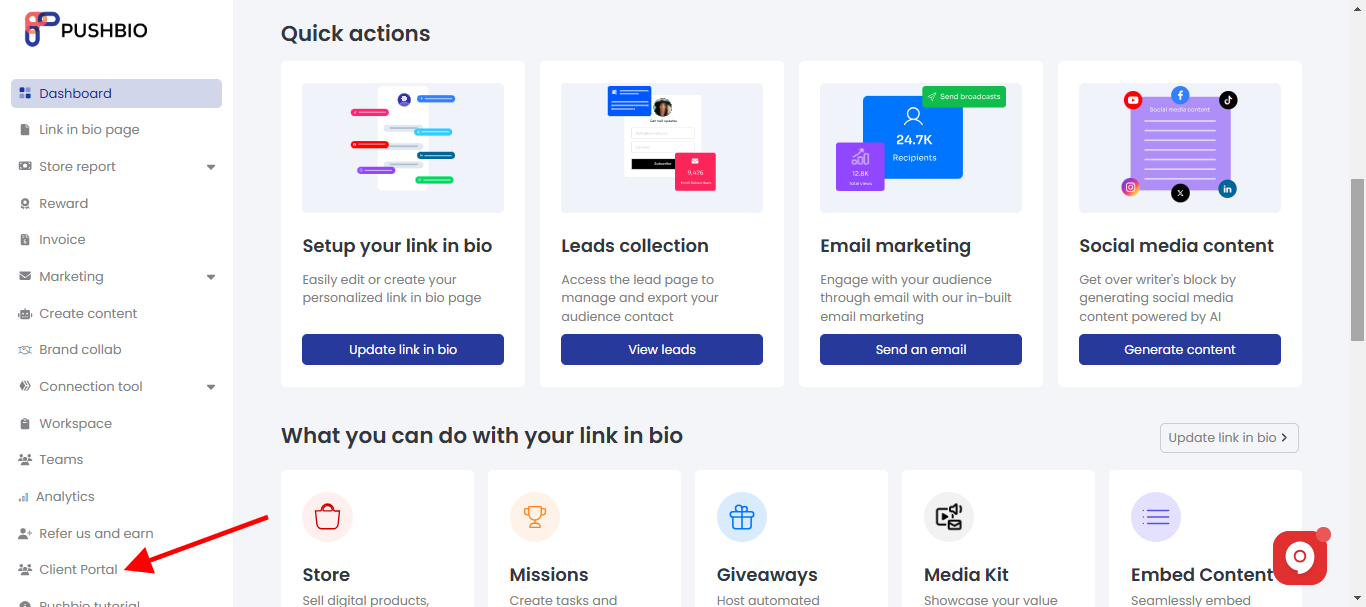
- Login to your Pushbio account;
- On the user dashboard area, click on the 'Client portal' option on the left sidebar menu;

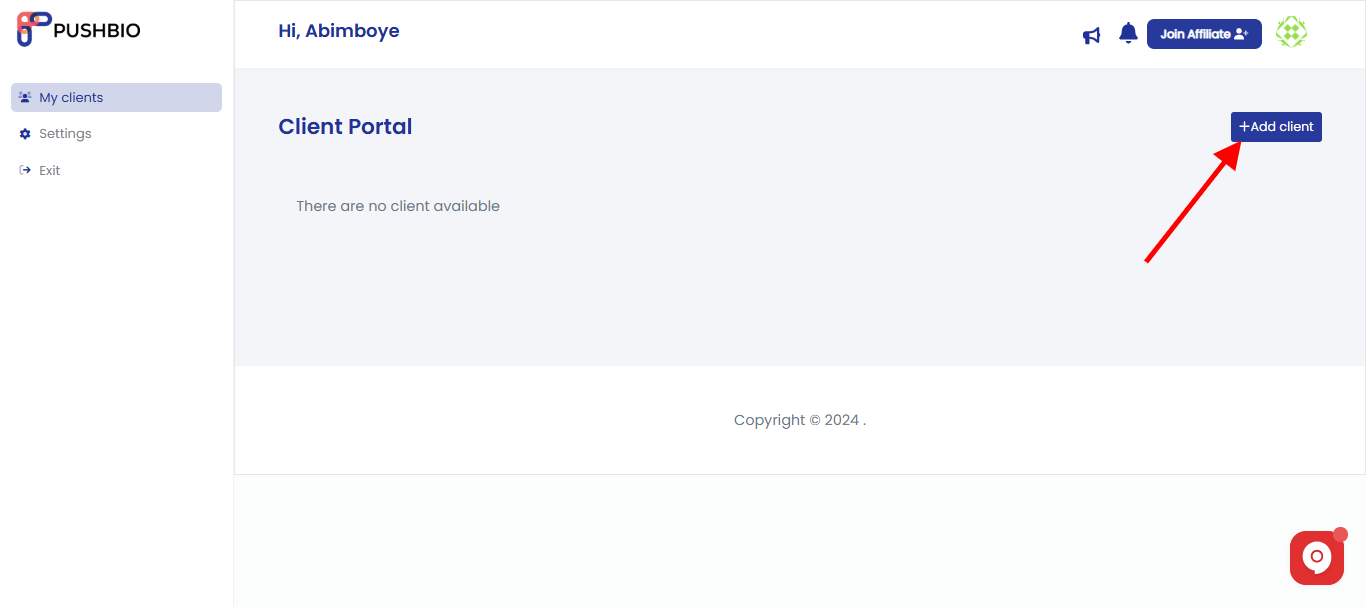
- On the next page, click on the 'Add client' button;

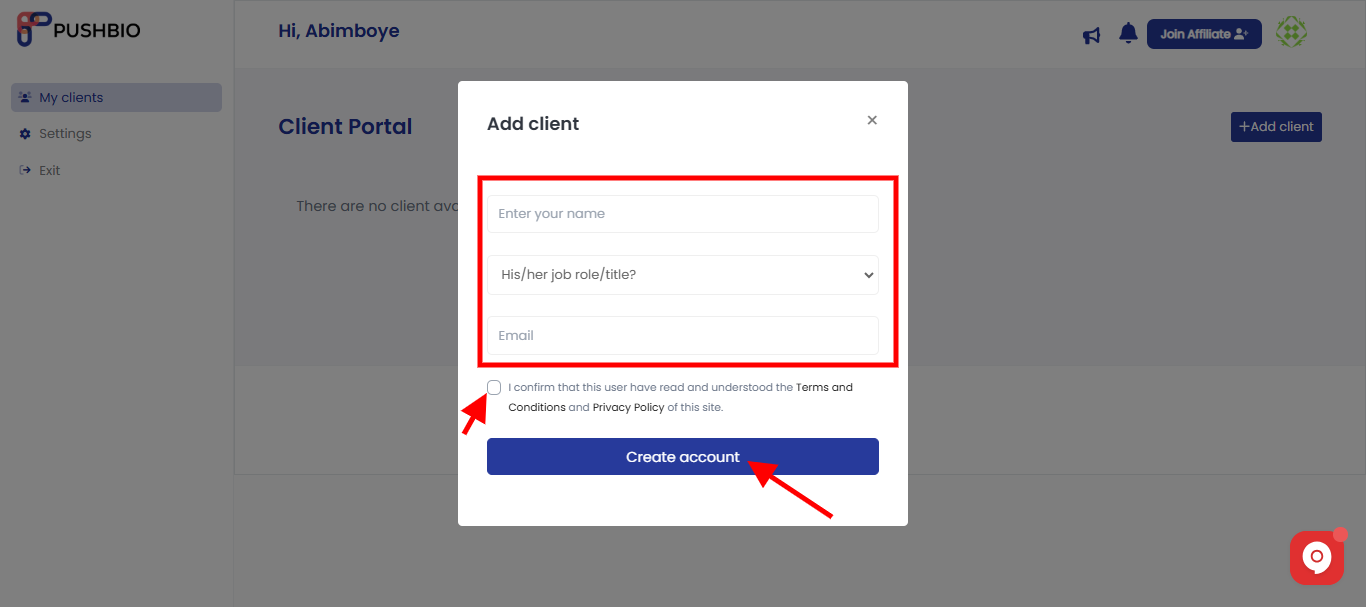
- In the popup page, enter your client name, select job title, and input a valid email;

- Next, check the user agreement box;
- Finally, click on 'Create account' button.
After clicking on the 'create button', the client will receive an email contain thier login and password details for the client portal access.
Read More: