Assigning workspaces to your clients from your Pushbio account is essential for streamlined collaboration and efficiency. It allows you to create dedicated spaces for each client, ensuring their projects and links are organized separately.
This helps maintain privacy, simplifies management, and enhances professionalism. By assigning workspaces, you can also provide tailored access to specific features, making it easier to meet client needs while keeping your overall workflow structured.
Here is how to assign workspace to your clients from your portal:
- Login to your Pushbio account;
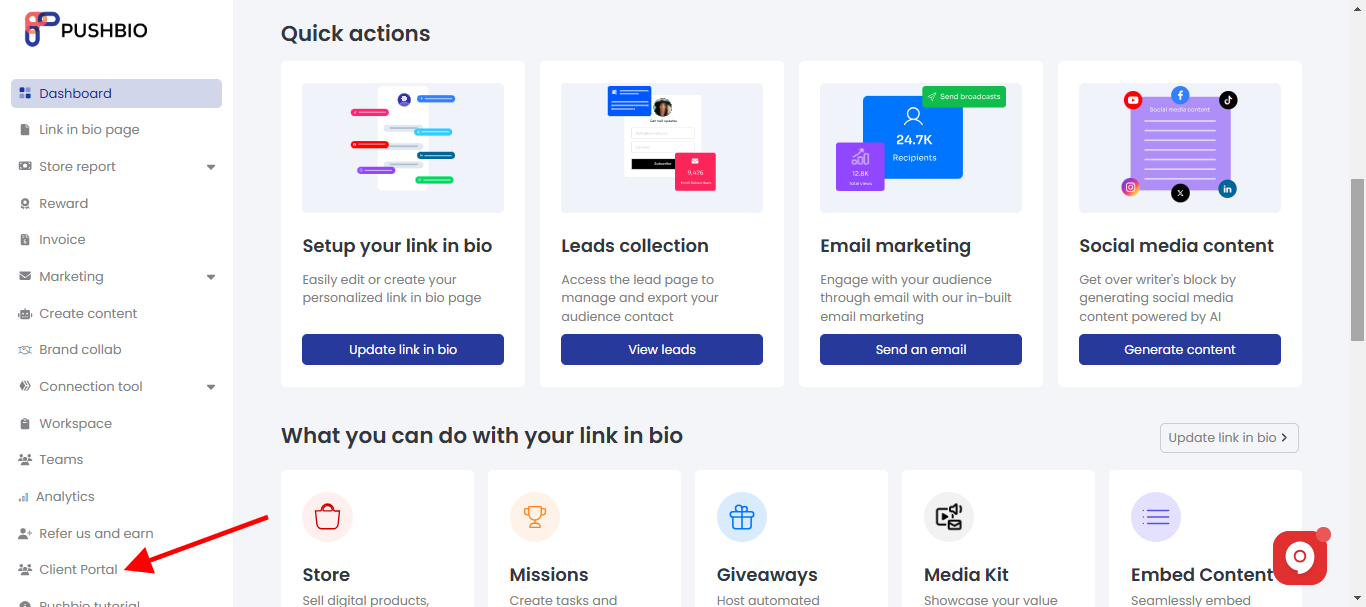
- On the user dashboard area, click on the 'Client portal' option on the left sidebar menu;

- On the next page, a list of your clients are displayed. Scroll to the client you wish to assign a workspace to and click on the 'manage' button in front of it;

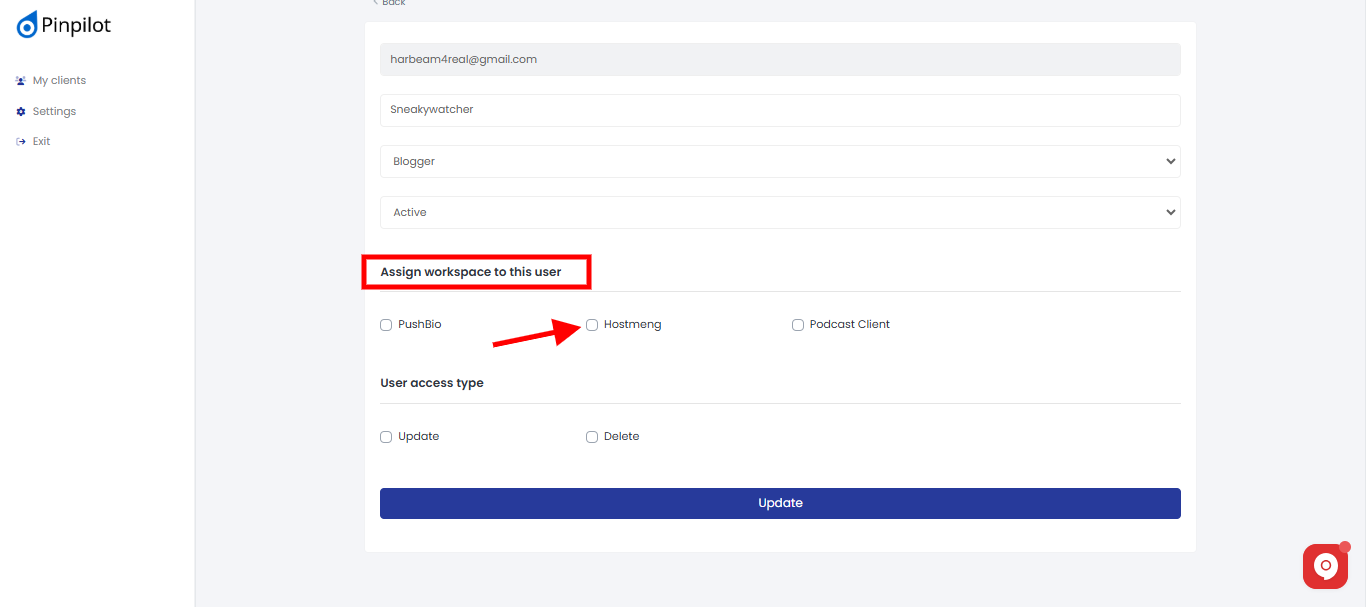
- Scroll to the 'Assign workspace to this user' section on the next page;
Before assigning a workspace to a client, ensure that all the links and pages you want the client to have access to are added to the workspace.
- Next, tick the exact workspace you wish to assign to the client;

- Under the 'User access type' section, tick the appropriate access type you wish to grant;
The 'Update' access gives clients the ability to update pages and links while the 'Delete' means clients can delete links and pages. If you fail to check any of the access boxes, the client will only be able to view links and pages and won't be able to work on them.
- Once assigned, click on the 'Update' button to save your changes.
Read More: