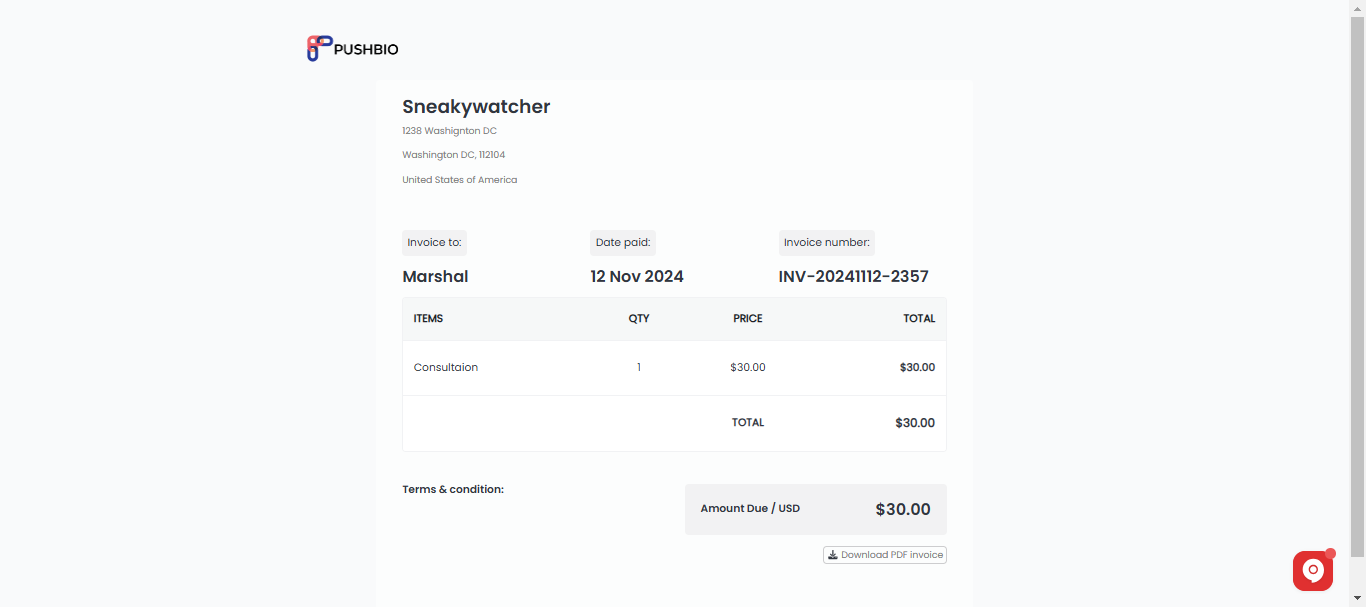
Sending bills to brands and receiving payments directly through your Pushbio account is a valuable feature for creators. It simplifies the payment process, allowing you to invoice clients and get paid without using multiple platforms.
This streamlined approach saves time, enhances professionalism, and keeps all transactions organized in one place. Plus, it adds flexibility for growing income from brand deals directly within the bio link page.
Follow these steps to send bills to brands:
- Login to your Pushbio account;
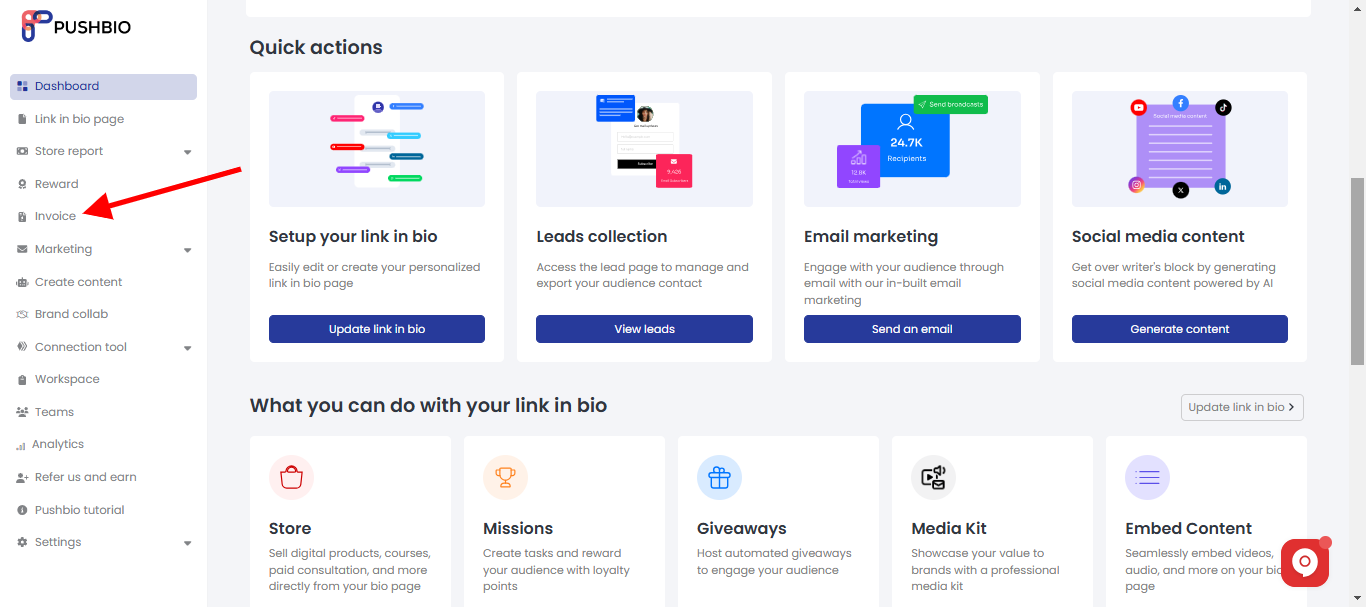
- Click on the 'Invoice' option on the left sidebar menu;
- Next, click on the 'Create invoice' button;
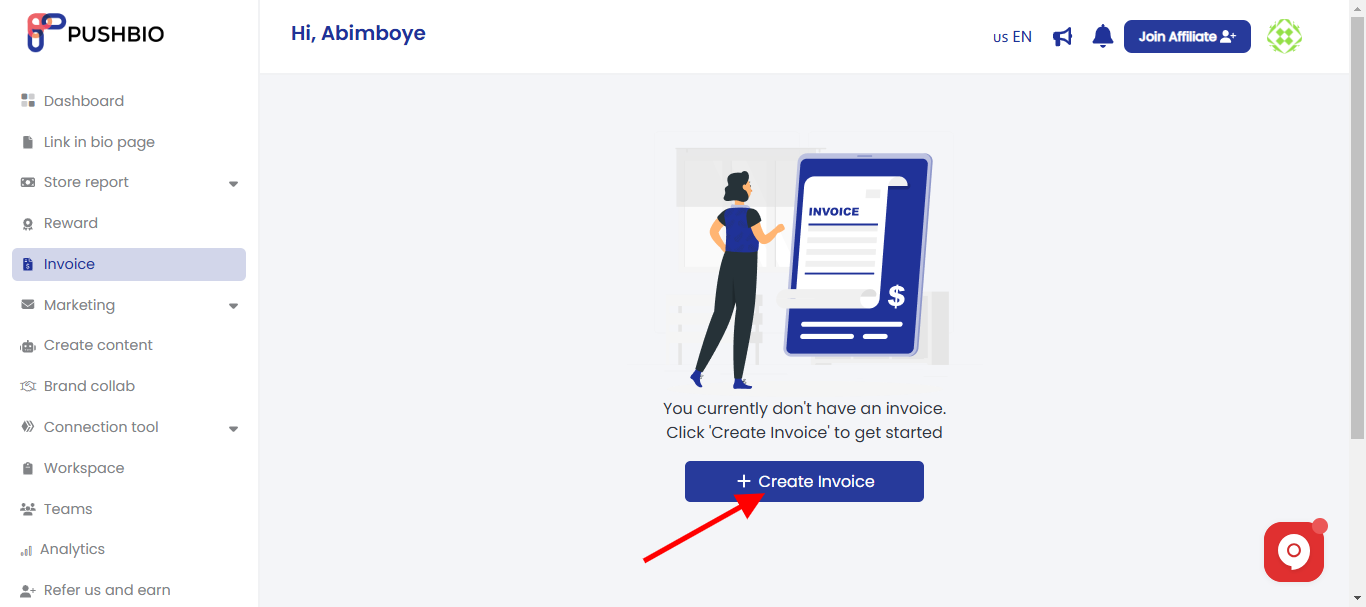
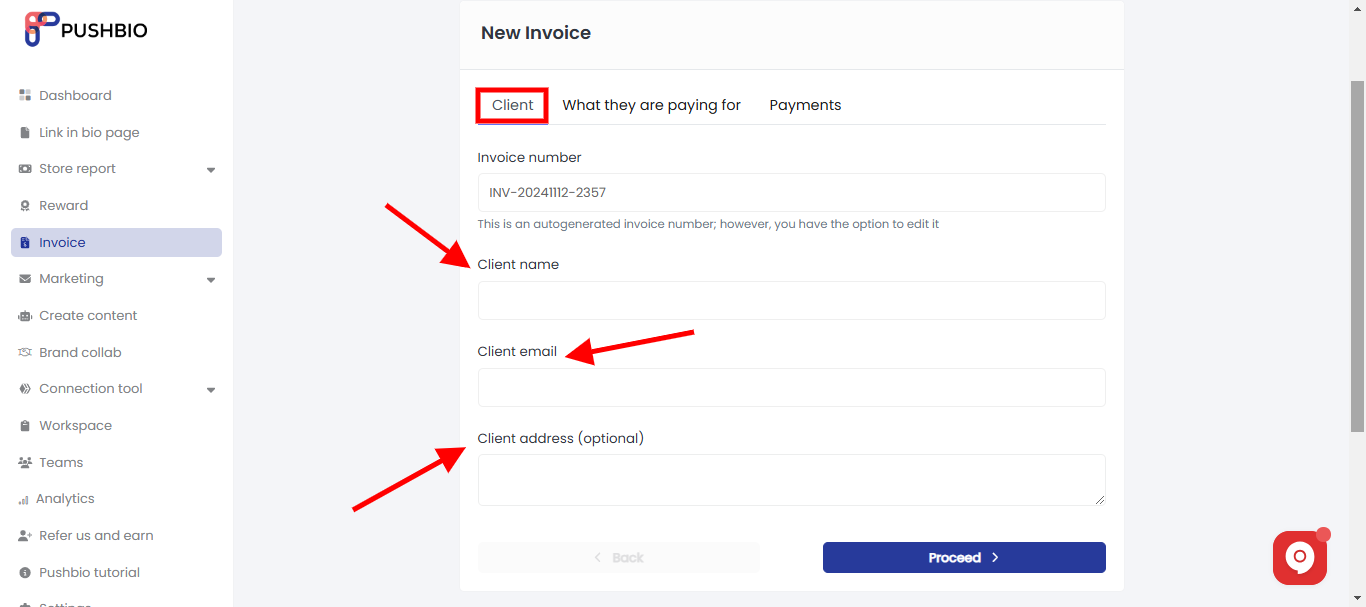
- This will generate a new invoice and you will be required to supply certain information;
- Under the 'Client' tab, fill out the client name, email and address;
- Next, click on 'What are they paying for' tab and fill out the description of service, price and quantity;
- You can click on the 'Add new' button to add new list of services offered;
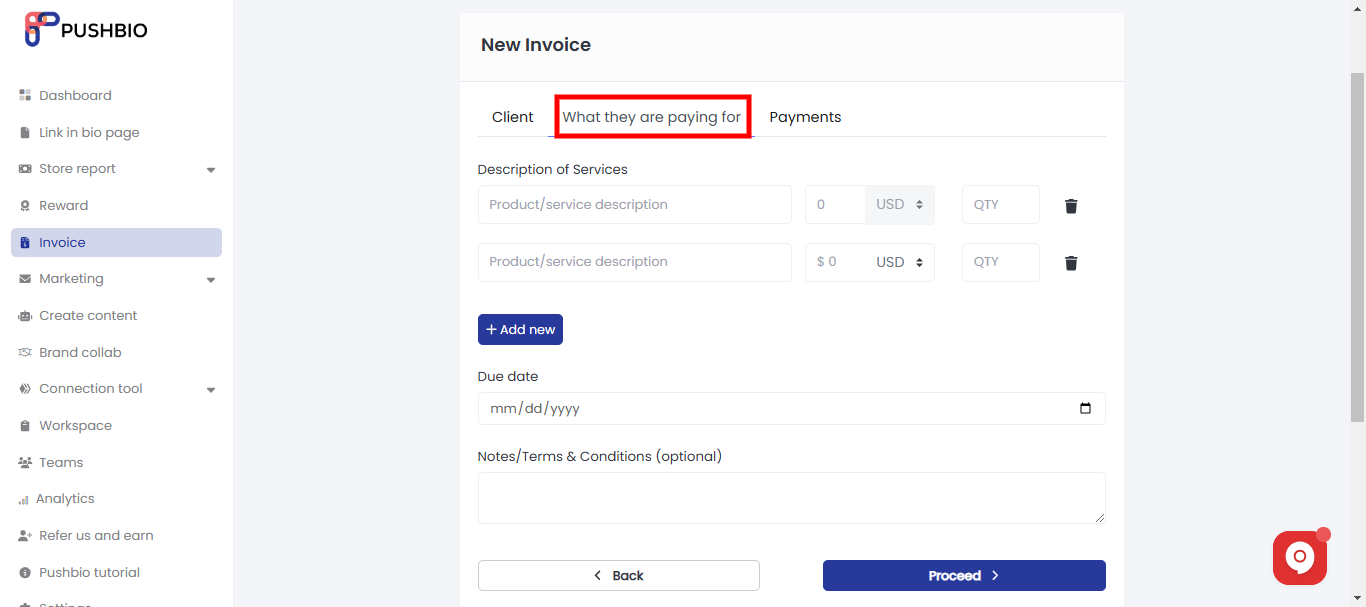
- Set a due date for the payment;
- Enter notes or terms and conditions if applicable;
- Next, click on the 'Payment' tab;
- Check the box infront of your prefered online payment method to allow your client pay the invoice online using a credit/debit card;
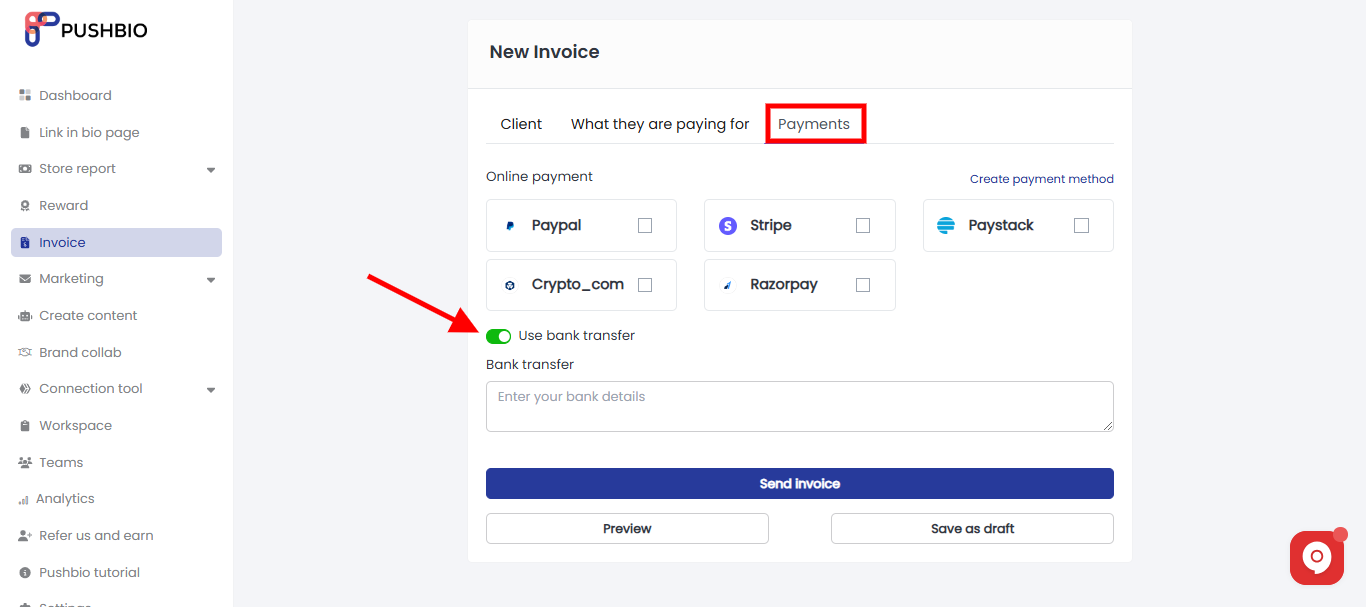
- Alternatively, you can toggle on the 'use bank transfer' option and fill in your transfer details if you prefer to receive the payment via bank to bank transfer;
- Once done. you can either preview your invoice or save as draft for later use;
- For instant use, click on the 'Send invoice' button to send your billings to the client.
Here is a sample of what your final invoice will look like when sent to your client
