Tracking clicks on shortened links is crucial for understanding how your audience engages with your content. It gives insights into what grabs attention, which links are most popular, and where your traffic comes from.
This data helps you make informed decisions, improve future content, and refine marketing strategies, ultimately enhancing audience engagement and boosting conversion rates.
- Login to your Pushbio account;
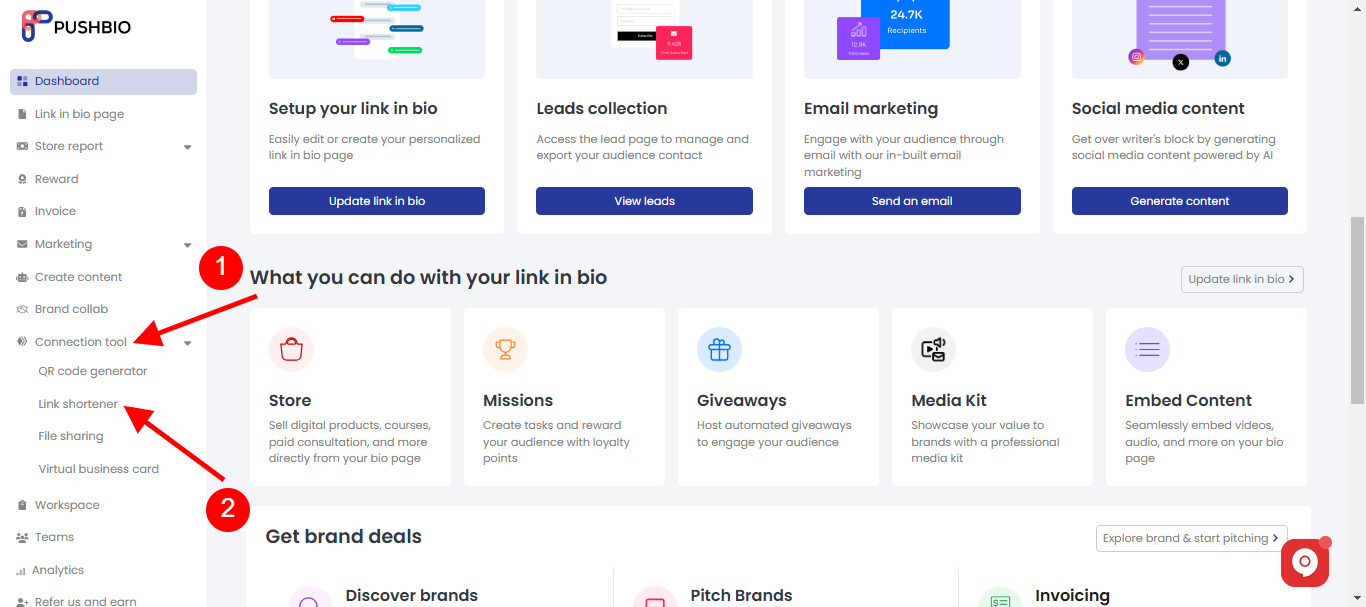
- From the user dashboard, scroll to and click on 'connection tool' and tap on 'Link shortener' from the dropdown list;

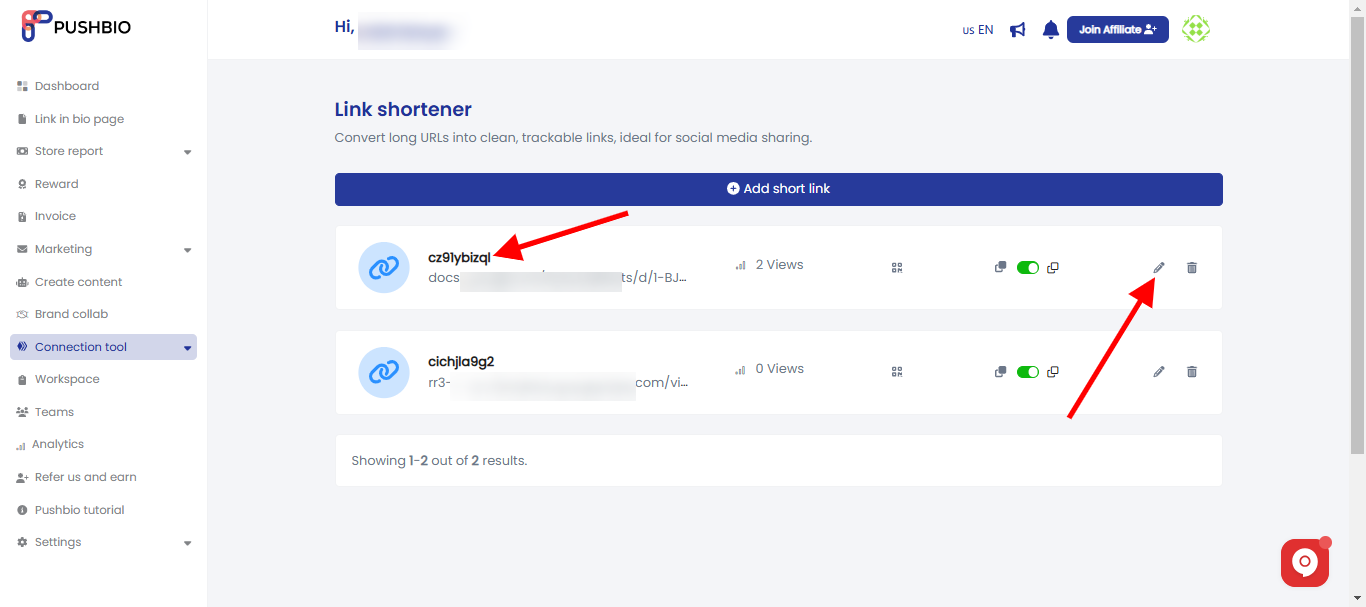
- A list of all your shortened links is displayed in the next page;
- Scroll to and click on the name or pencil icon in front of the shortened link you wish to track its clicks;

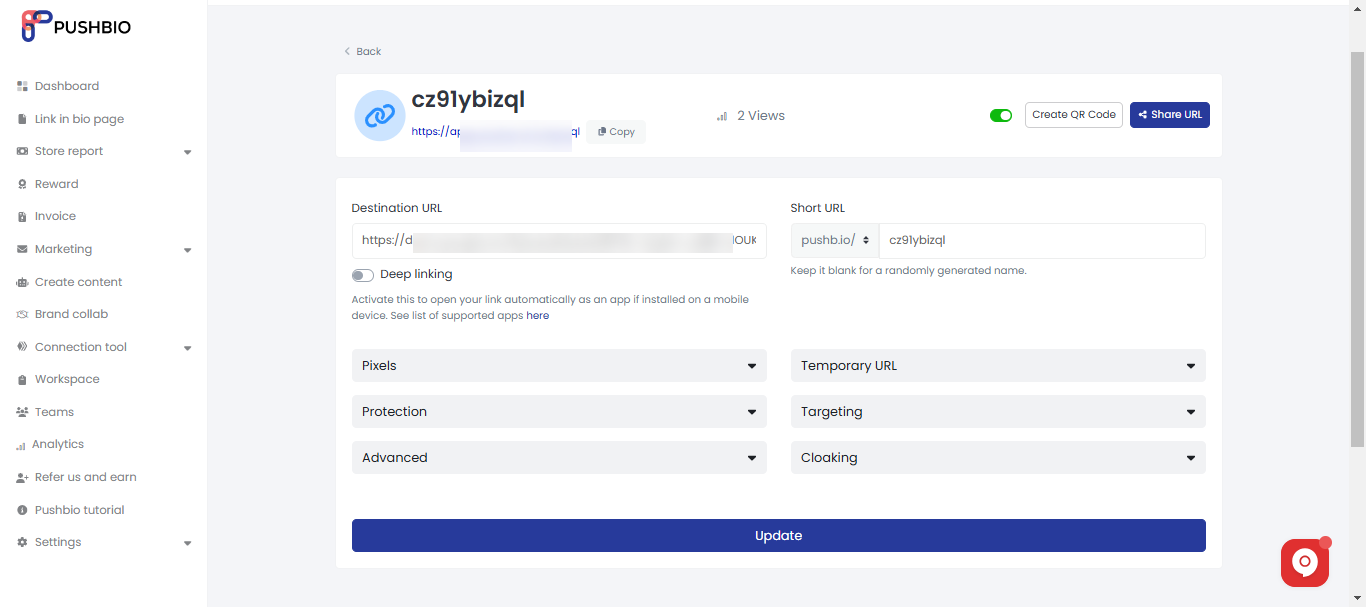
- On the next page, you haev a series of tracking features you can activate for your shortened link;

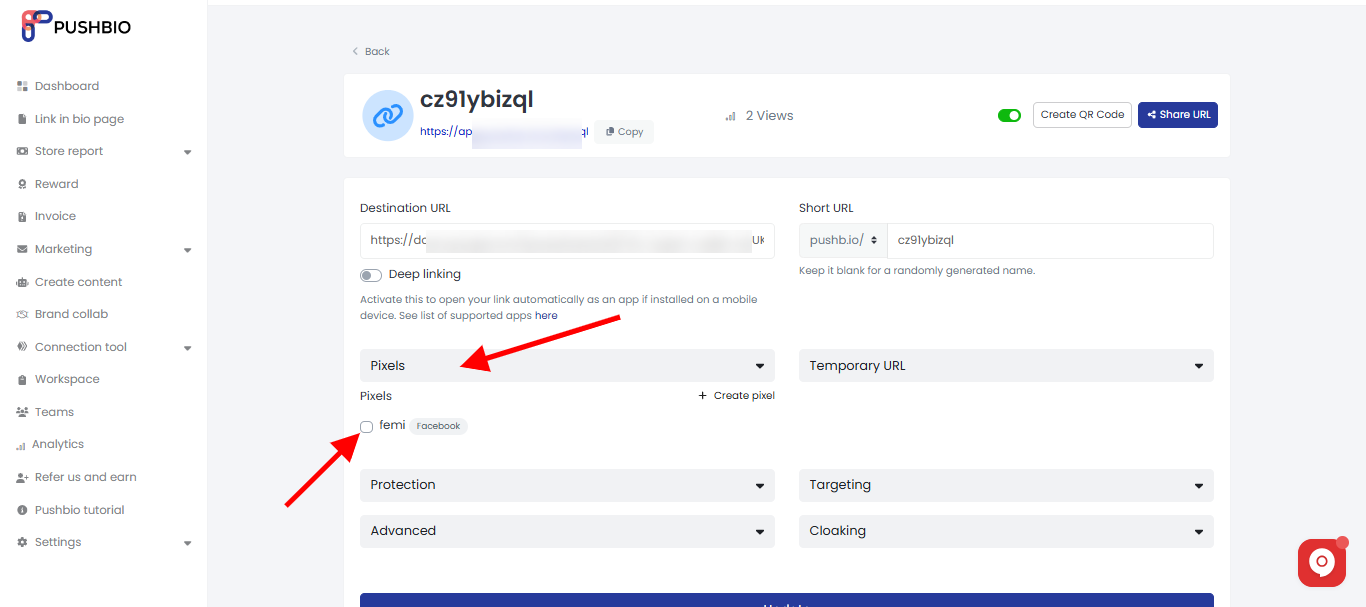
- To activate Pixels, click on the 'pixel tab' and select the corresponding pixel you wish to use to track clicks on the link;
If you haven't created an pixels yet on your Pushbio account, click on the 'create pixel' button to do so.

After adding your pixel tracker, click on the 'Update' button at the bottom of the page to save your changes.
You can view your tracking data on the general analytics page or by viewing the analytics of the specific shortened link.