Having a virtual business card (vCard) on your Pushbio page makes it easy for others to save your contact details quickly and accurately. With a simple click, users can download your information directly to their devices, including your name, phone number, email, and business details.
This feature is perfect for networking, enhancing professionalism, and ensuring potential clients or collaborators can reach you effortlessly. It streamlines sharing contact information, saving time and reducing errors.
- Login to your Pushbio account;
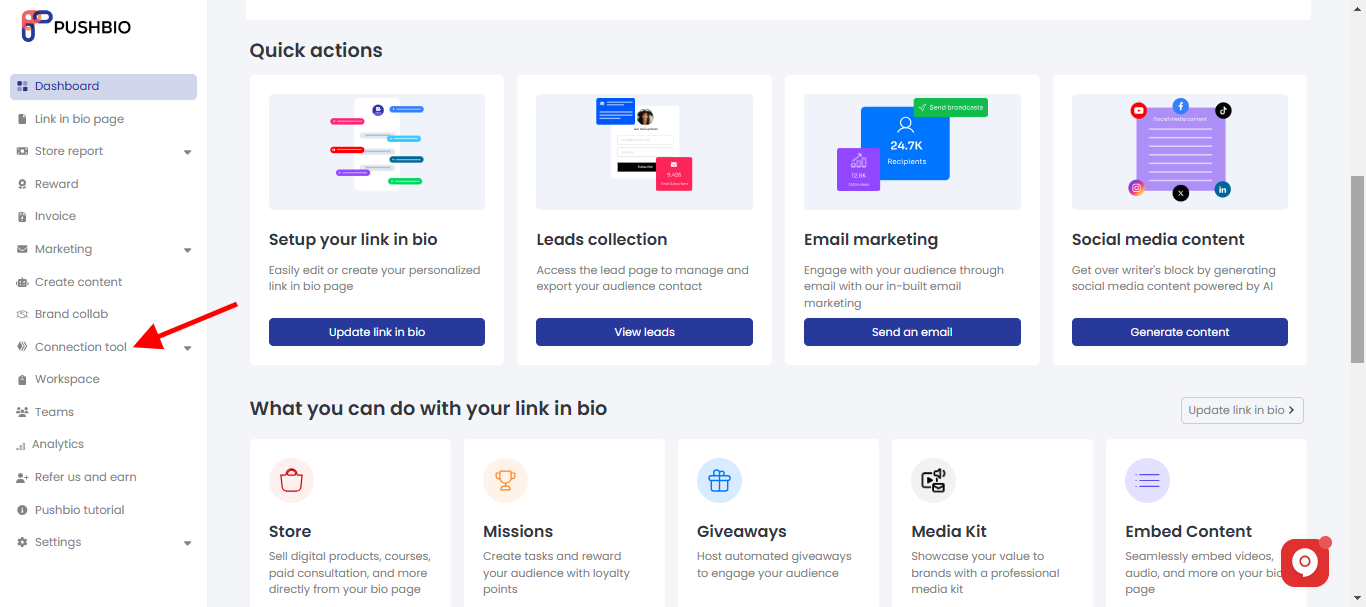
- Click on the 'connection tool' tab on the left sidebar menu;
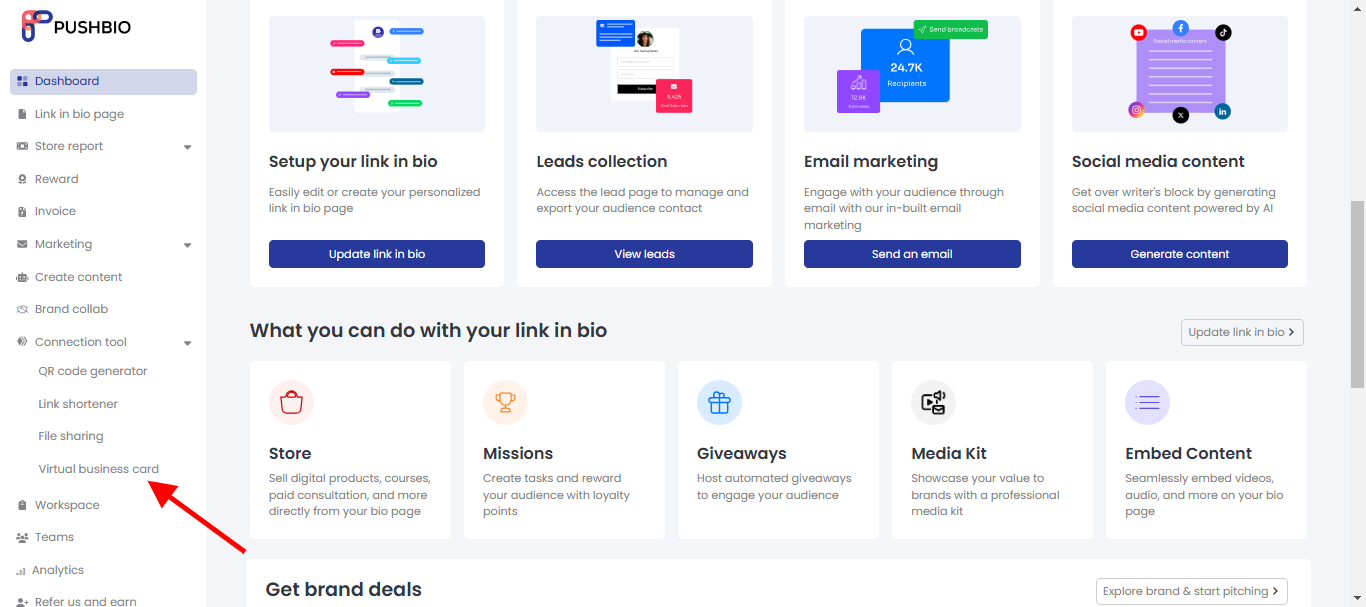
- From the drop down list, click on the 'Virtual business card' option;
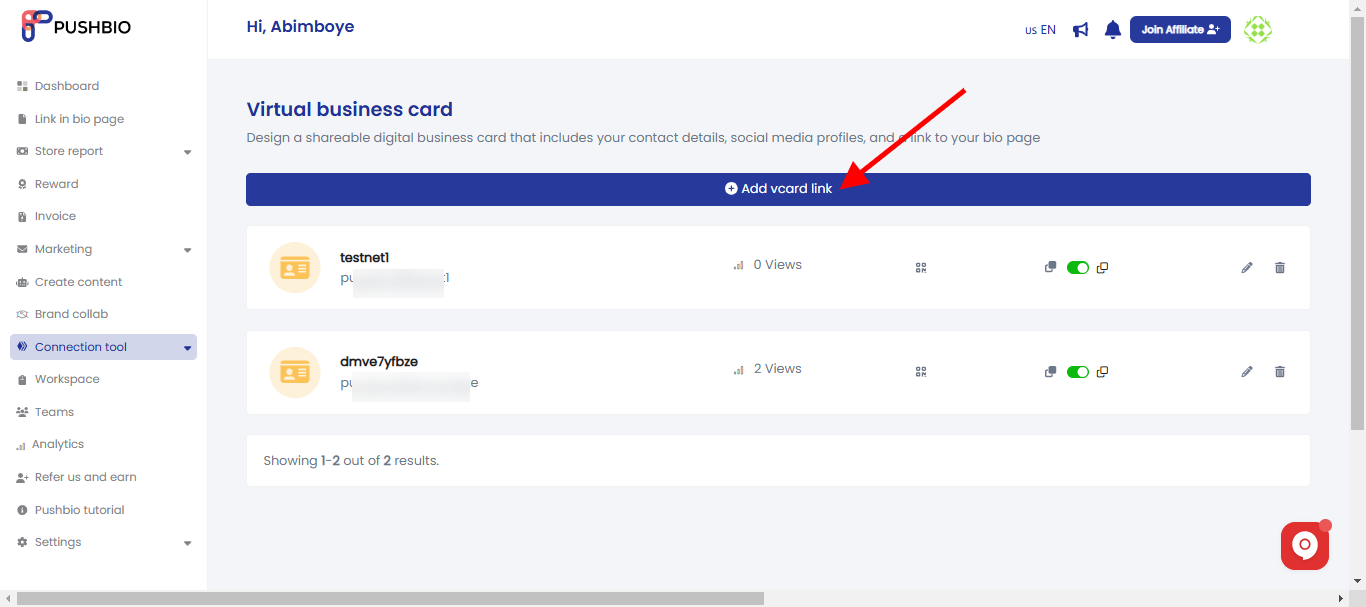
- Next, click on 'Add vcard link' button to create a new vcard;
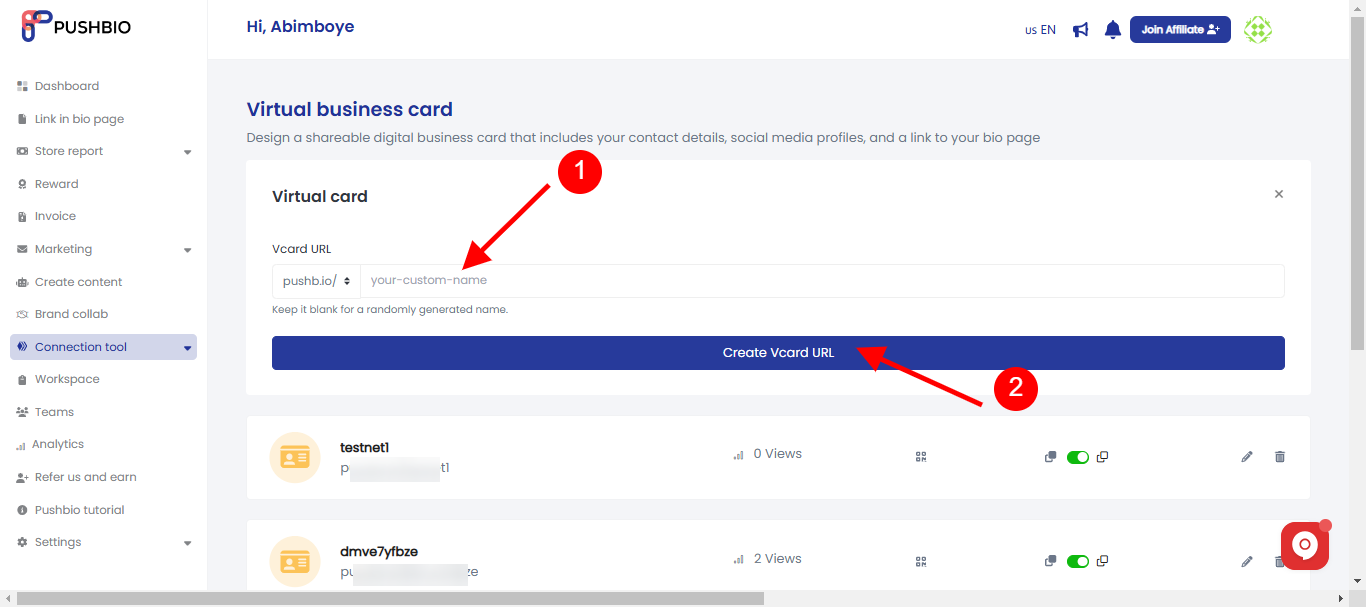
- Enter a preferred name for your vcard link or leave blank for a randomly generated one;
- On the next page, you can customize your vCard fully.
- Fill in your details into the corresponding boxes provided;
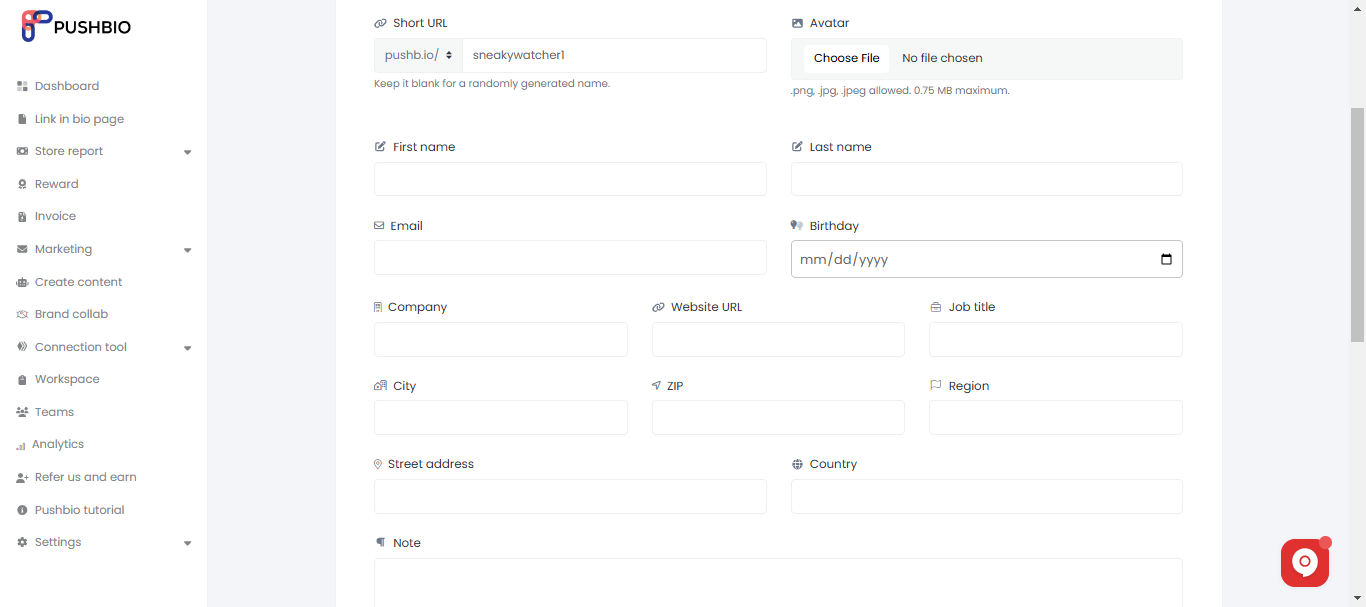
- Upload an avatar for your vcard link by clicking on the 'choose file' button;
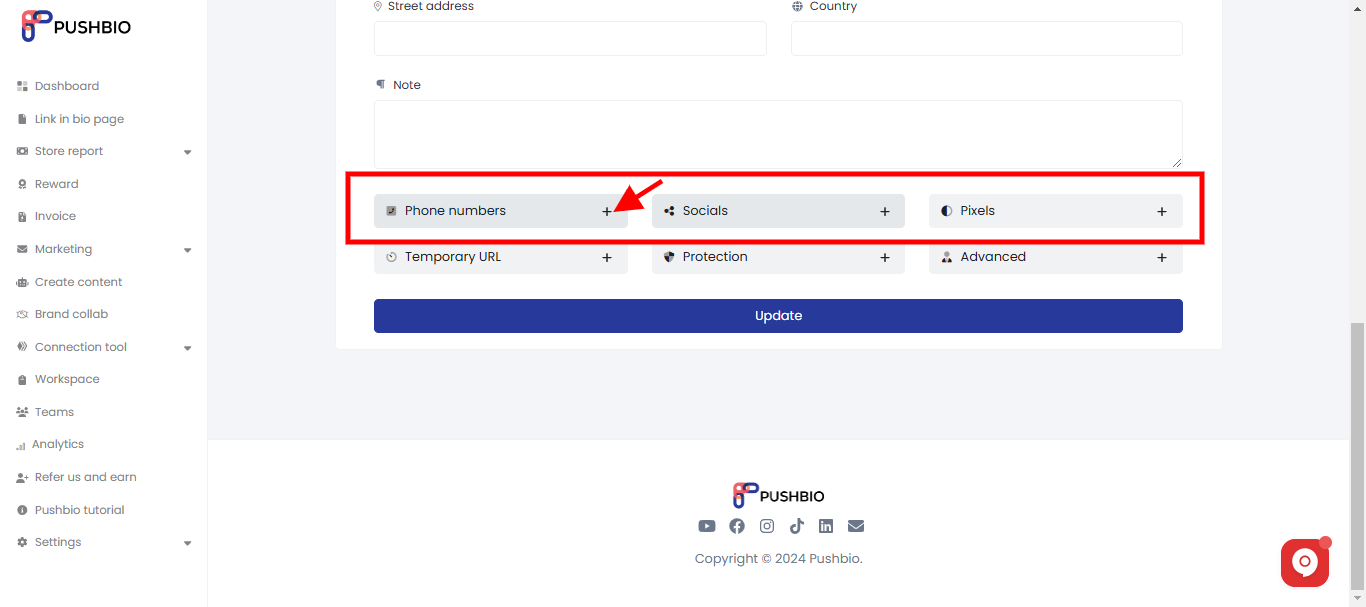
- You can also add phone numbers, socials, and conversion pixel by clicking on the '+' icon in front of the appropriate option;
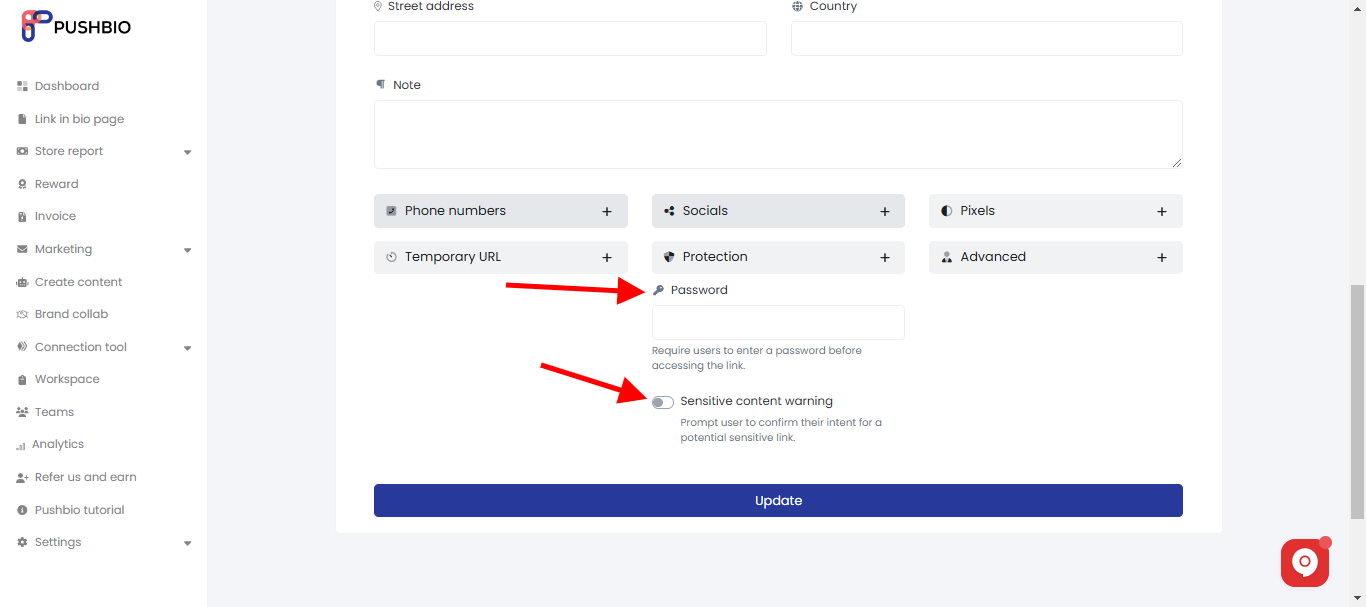
- You can also password-protect your vcard as well as turn on 'sensitive content warning' to protect the audience;
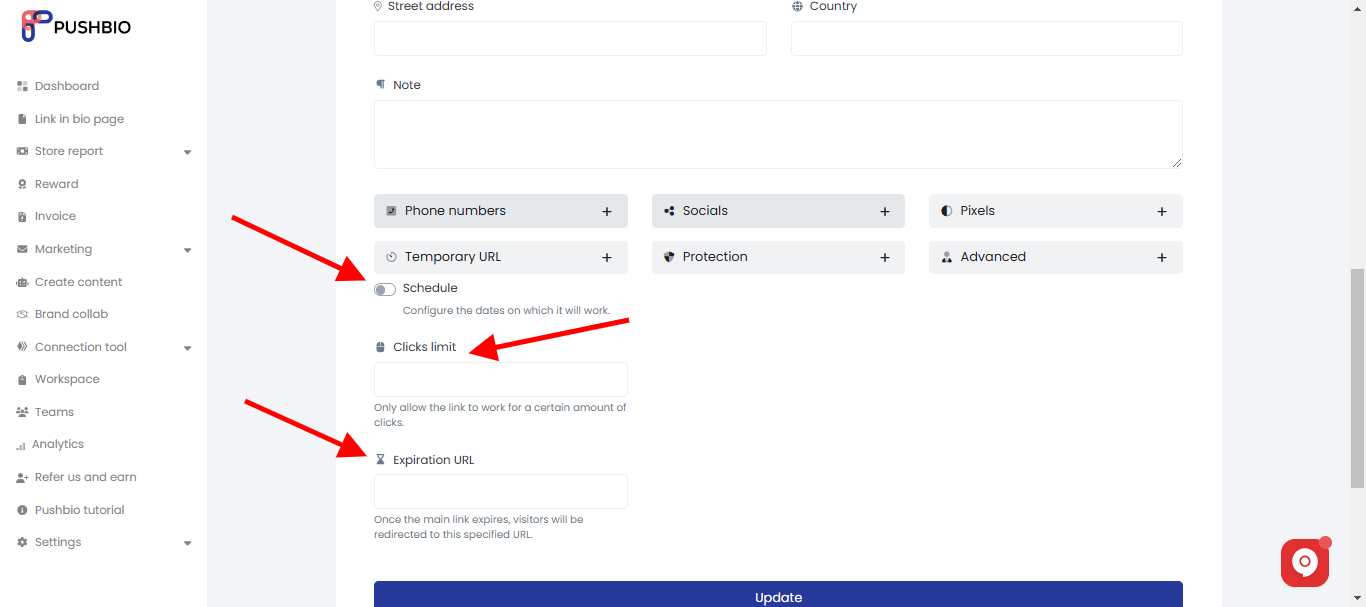
- Under the 'Temporary URL' option, you can schedule dates you want your vcard link to work. You can also set 'Click limits' as well as 'Expiration URL';
- Under the 'Advanced' tab, you can assign a workspace to your vcard link;
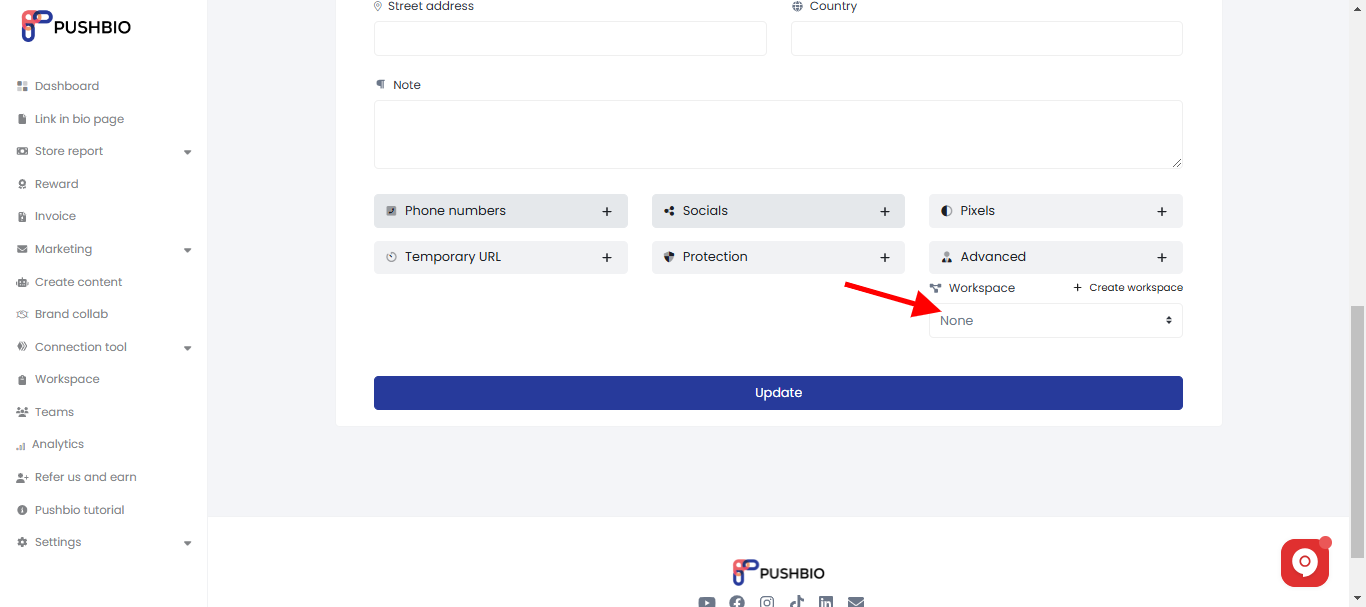
- Once you are done with all your customization, click on the 'Update' button.
Read More: