Enabling and disabling two-factor authentication (2FA) on your Pushbio account enhances security by adding an extra layer of protection. With 2FA enabled, even if someone knows your password, they cannot access your account without the second authentication step.
This safeguards sensitive information, including payment settings and analytics. The flexibility to disable it when necessary ensures convenience while maintaining control over your account's security.
Here is how you can turn on and off two factor authentication:
How to Enable Two Factor Authentication
To enable 2FA on your account, follow these steps:
- Login to your Pushbio account;
- From the user dashboard page, scroll to and click on 'Settings' tab on the left sidebar menu;

- From the dropdown list, click on the 'My Account' option;

- On the next page, ensure you are on the 'my account' tab;
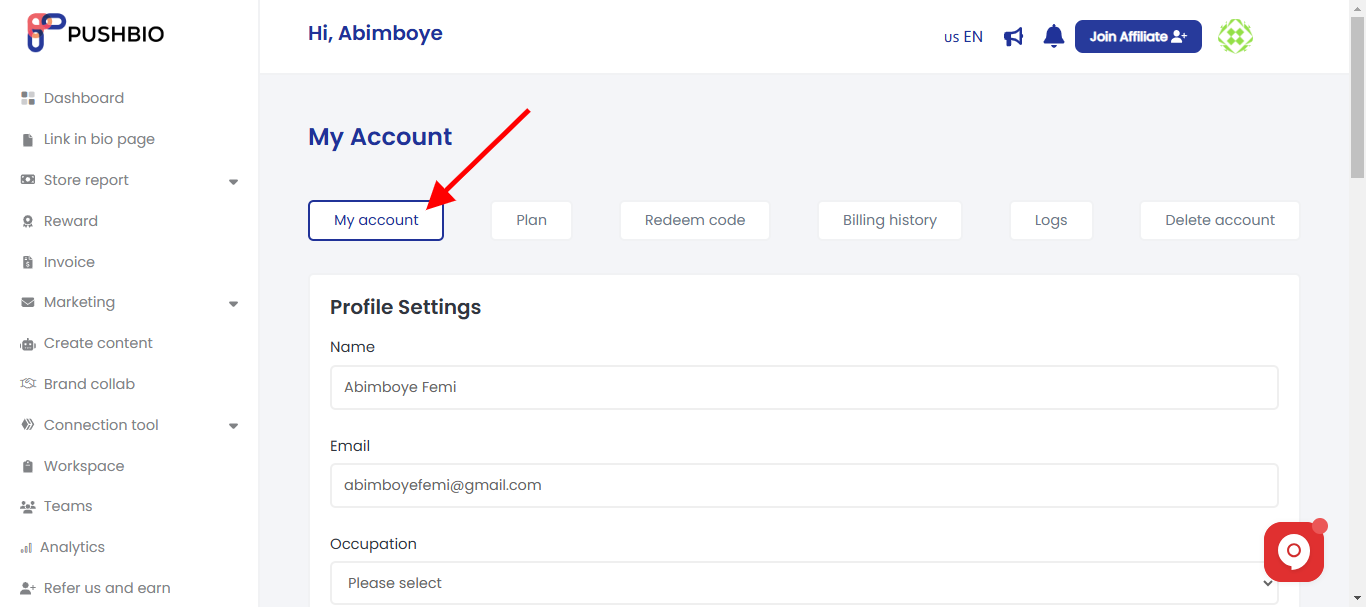
- Scroll down to the 'Two factor authentication' section of the page;
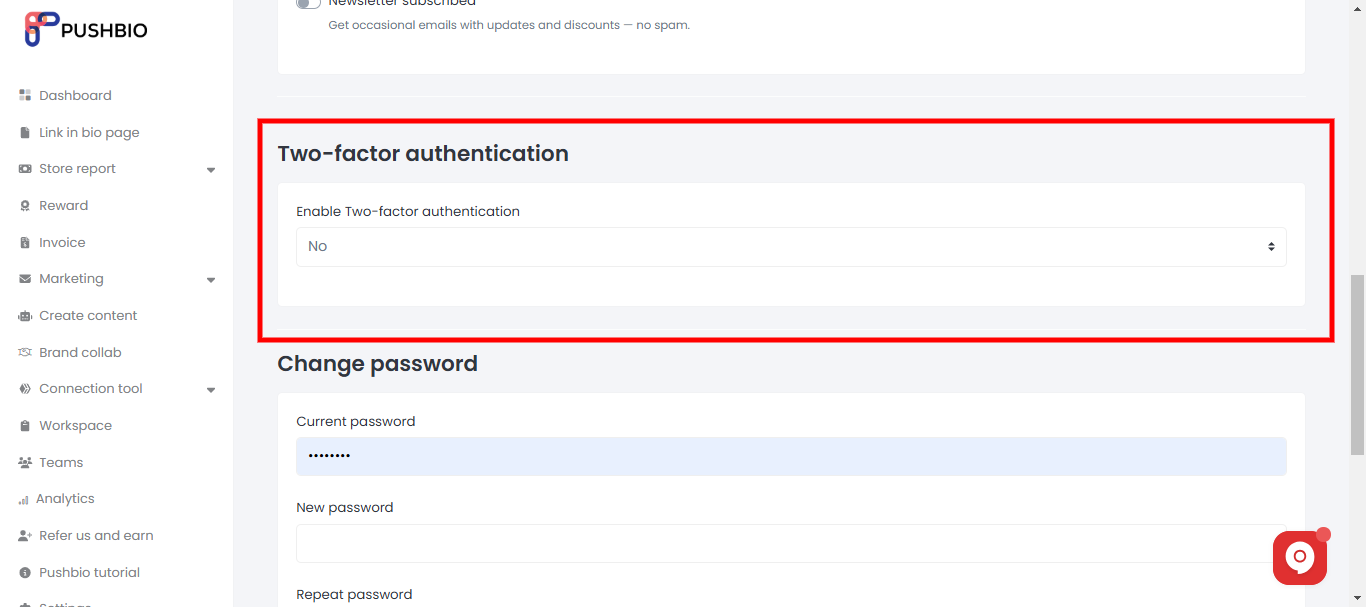
- By default, your 2FA is set to 'NO.' Click on it and change the option to 'YES';
- Next, scan the displayed QR code with your authentication app from a mobile device;
- If you are unable to scan the code, you can input a secret code generated by us into your authentication app;
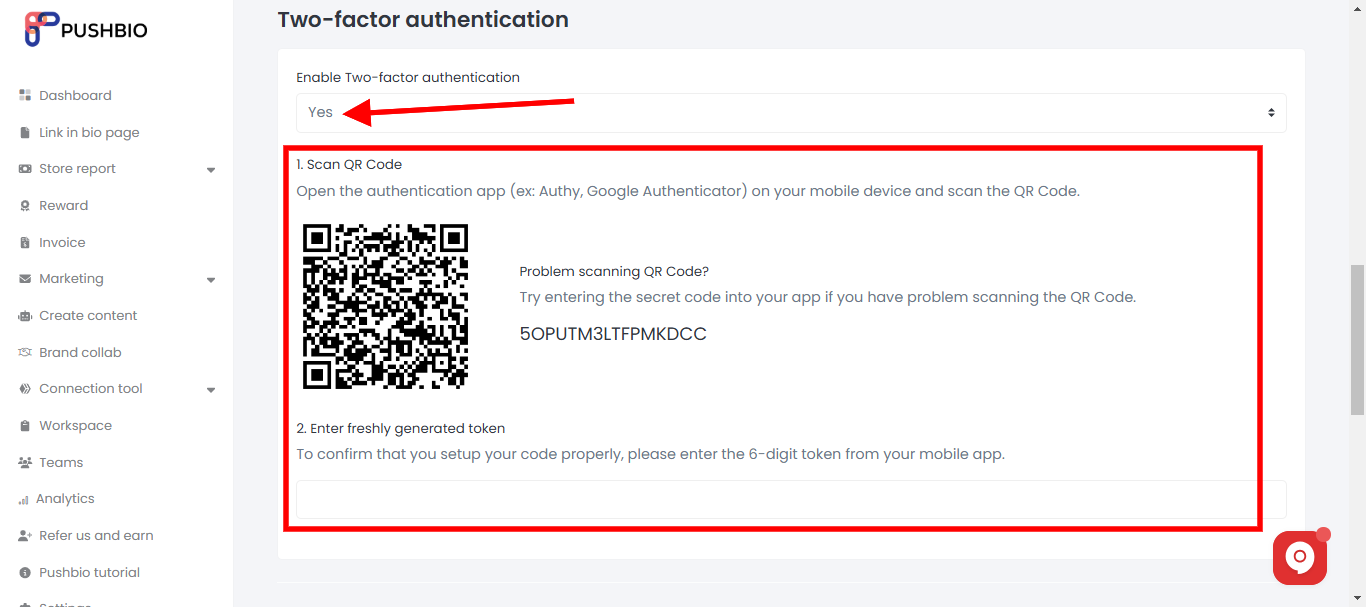
- Either way, your authentication app should provide you with a 6-digit token which you then input into the provided field on your Pushbio two-factor authentication page.
- Once this is done, press 'Update' button to finalize the process.
Your two-factor authentication is set up. During your next login, you'll need to enter a code from your authenticator app.
How to Disable Two Factor Authentication
You can also quickly turn off your 2FA if you so choose by following these steps:
- Login to your Pushbio account;
- From the user dashboard page, scroll to and click on 'Settings' tab on the left sidebar menu;

- From the dropdown list, click on the 'My Account' option;

- On the next page, ensure you are on the 'my account' tab;

- Scroll down to the 'Two factor authentication' section of the page;
- Since 2FA is enabled, it will be marked as 'YES';

- To disable it, click on the 'YES' option and from the dropdown list, change it to 'NO'
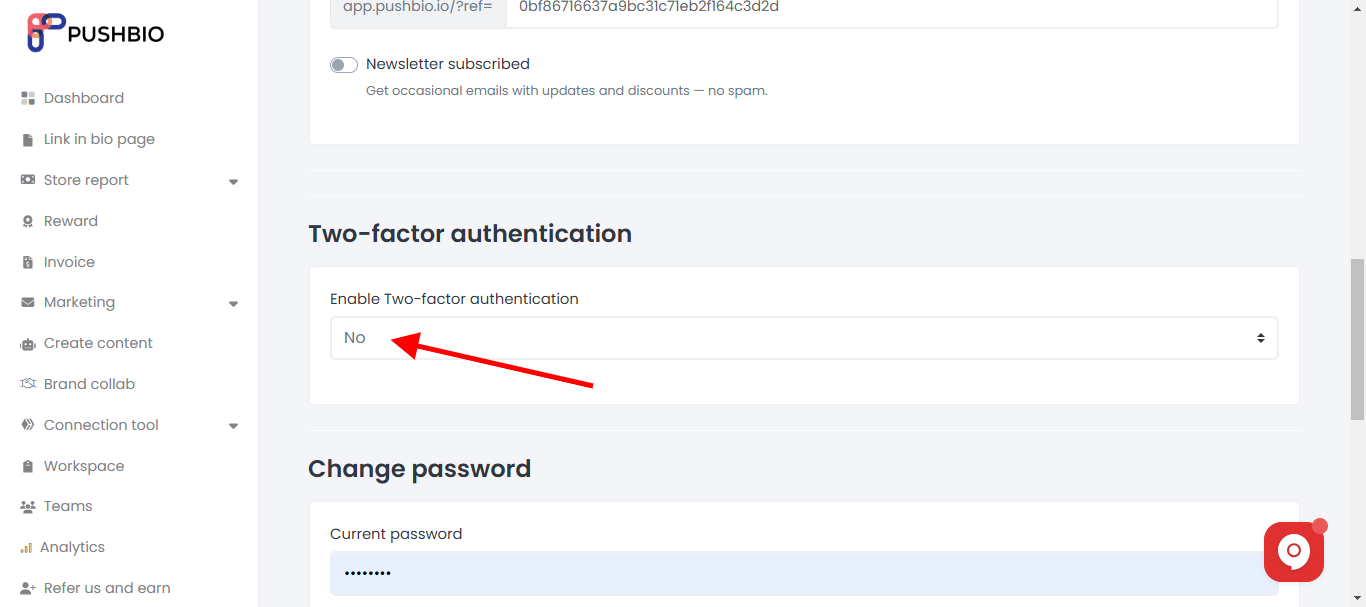
- Next, click on the Update' button to save your changes and disable the 2FA.
Read More: