The ability to create, send, and manage email newsletters directly from your Pushbio account is a valuable feature for building a strong connection with your audience. It lets you share updates, promotions, and exclusive content directly with subscribers, keeping them engaged and informed.
Plus, managing newsletters in one place streamlines your workflow, making it easy to track engagement, refine your messaging, and nurture loyal followers who look forward to your content.
To use this feature, you must have created an email list with subscribers.
Here is how you can create and send newsletters from your Pushbio page:
- Login to your Pushbio account;
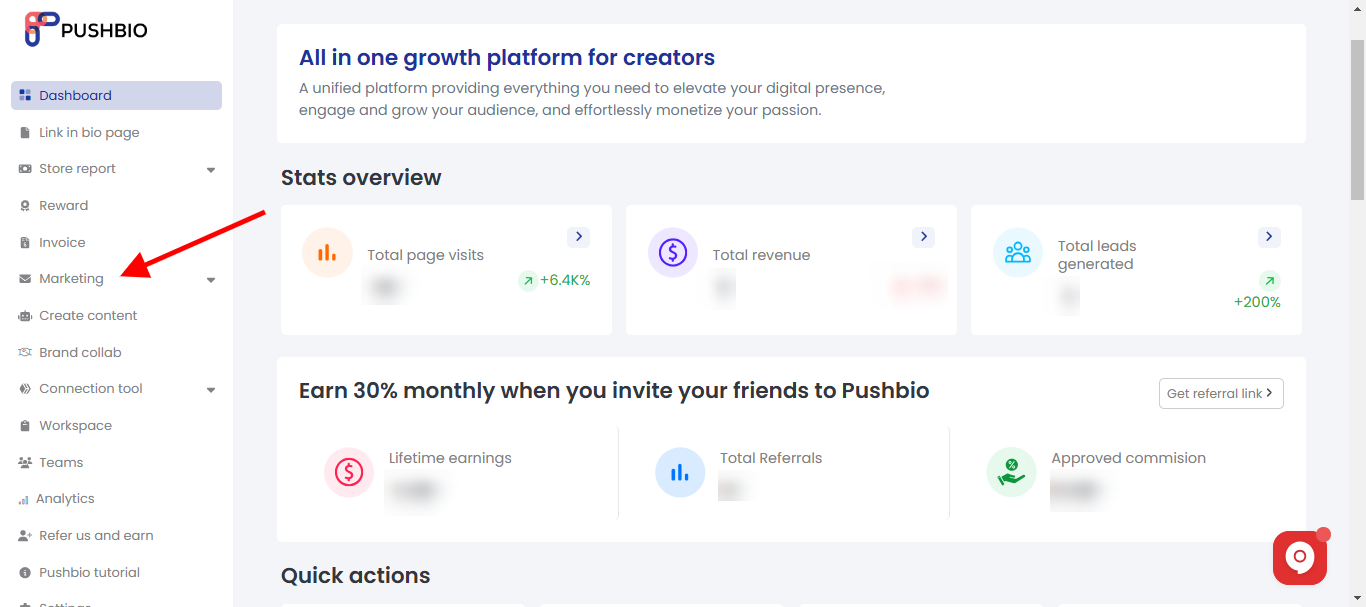
- On the user dashboard, click on the 'Marketing' tab on the left sidebar menu;

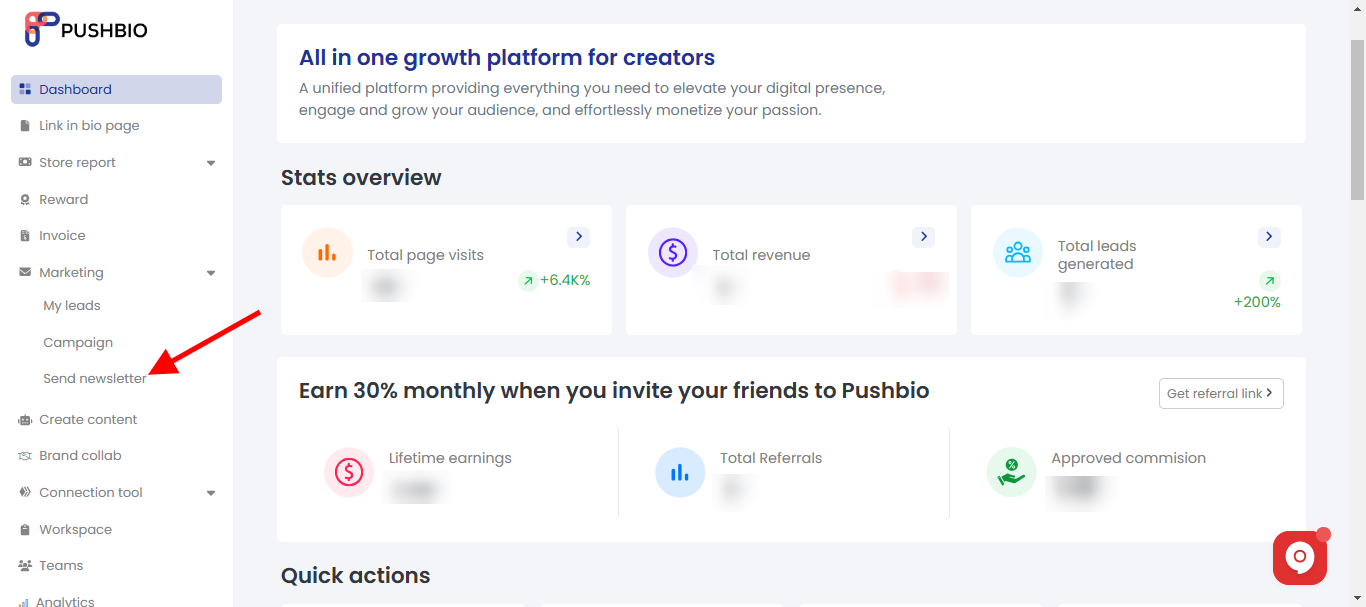
- From the dropdown menu, click on the 'send newsletter' button;

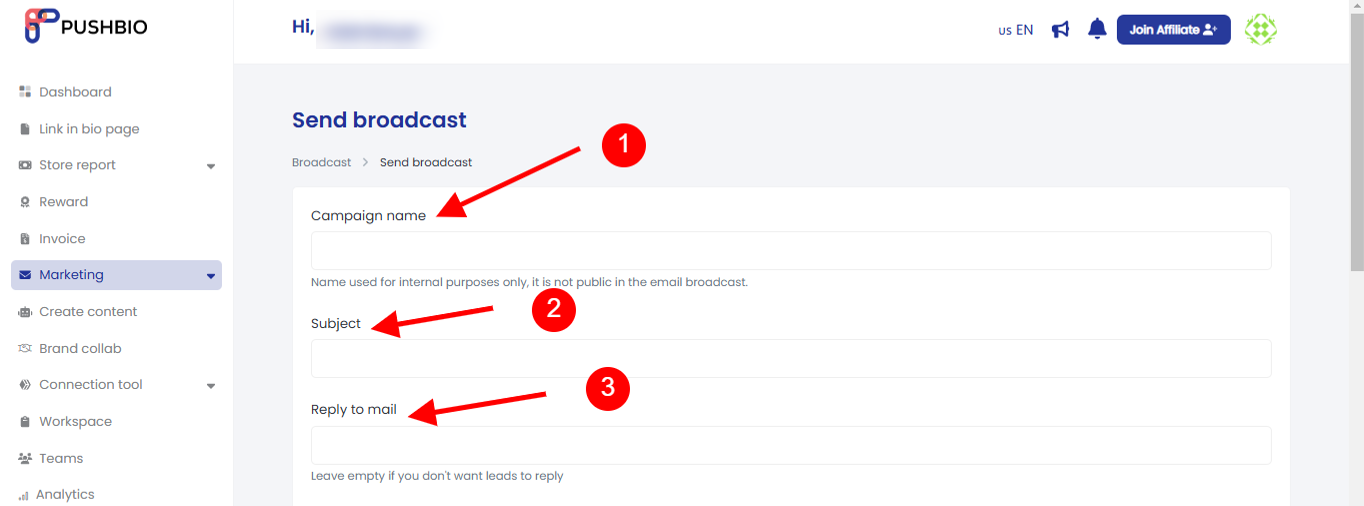
- Enter a campaign name in the 'Campaign Name' box;
- Input a subject for your newsletter in the box labelled 'Subject';

- If you wish for your leads to respond to your newsletter, provide an email address in the 'Reply to mail' box;
- Click on the 'Select List' column and from the dropdown menu, pick the corresponding list you wish to send your newsletter to;

- Enter the body of your mail into the 'Mail content' box. You can use our text editor tool to fine tune your mail;
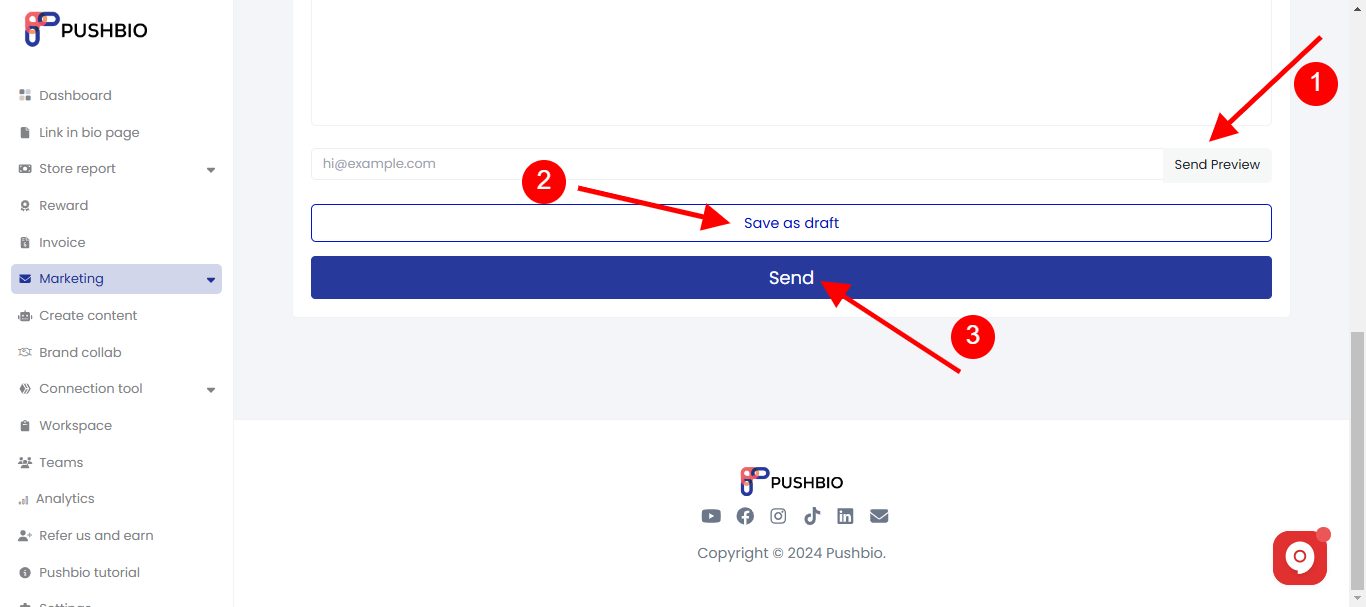
- Once youre done, you can choose to send a preview of your newsletter by entering an email address in the 'Preview' box and clicking on preview;

- Alternatively, you can save your newsletter by clicking on 'Save as draft' for use later;
- Once satisfied with your newsletter, click on the 'Send' button to dispatch ypur newsletter to your subscribers.